
In this Photoshop tutorial, we will create a display of 3D software boxes, but in practice we could also use this process for any box.
Our Photoshop mockup here is very flexible. We can add a reflection on the floor, change its background color, and so on. We will also use smart layers which will allow us to easily edit the content in just a few clicks. Let’s begin!
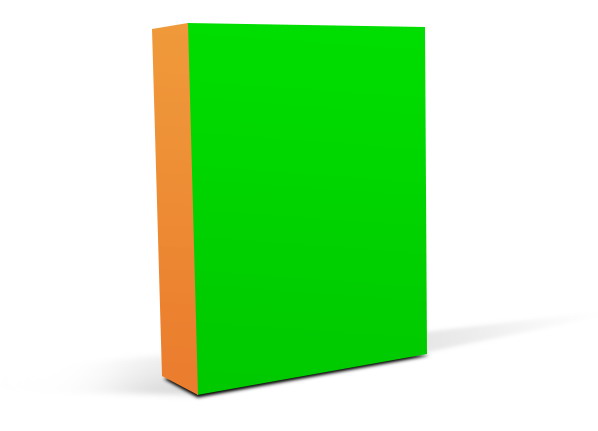
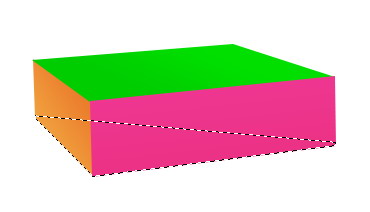
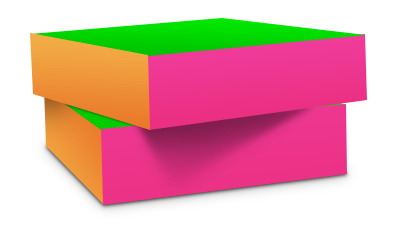
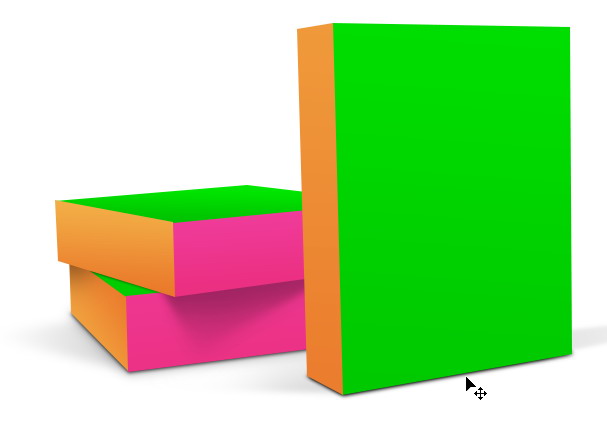
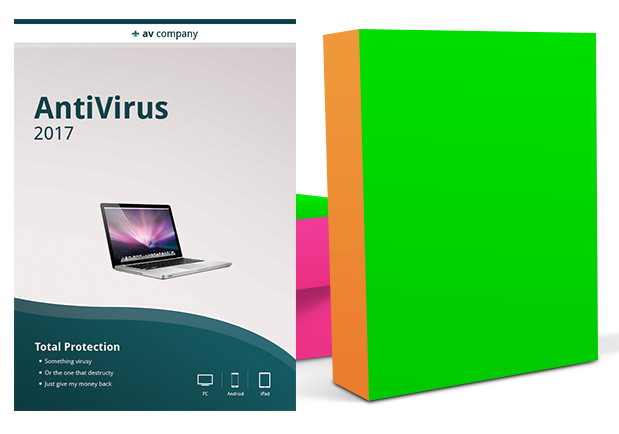
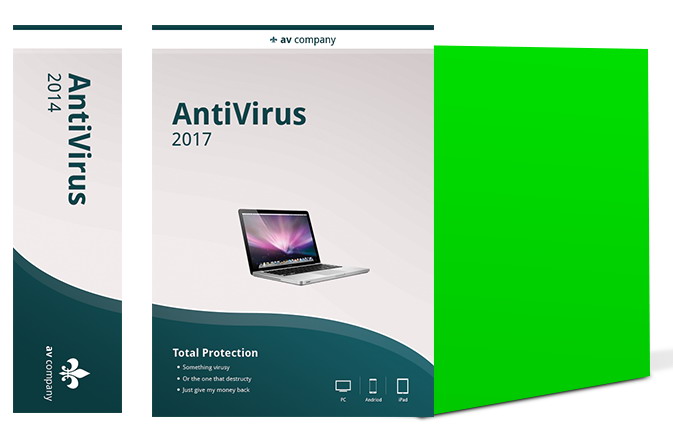
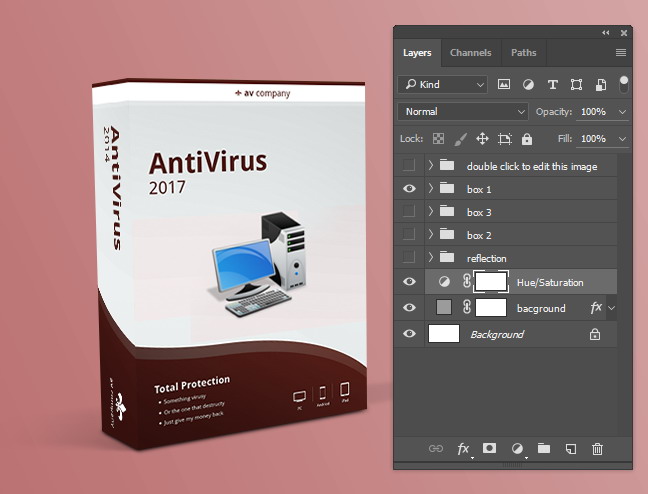
Final Image
This is the mockup that we are going to design. It has a reflection, editable background color, and smart layer content.

Step 1: Preparation
To make a convincing mockup, you need to make sure that the scene is accurate. A bit of knowledge on drawing techniques and concept of perspective will help you. Another solution is photographing real boxes and use it as a reference for your drawing. You can also use 3D software to create a standard scene and then render it for later reference in Photoshop. Any technique is great.
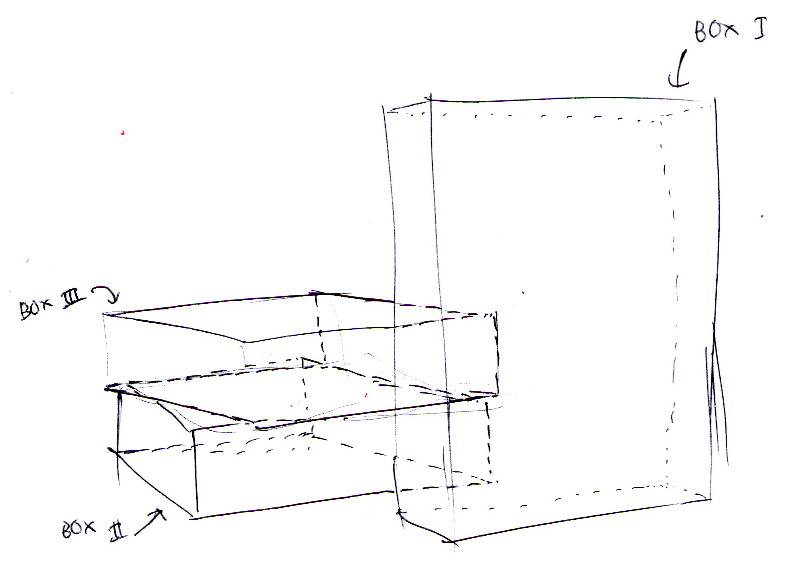
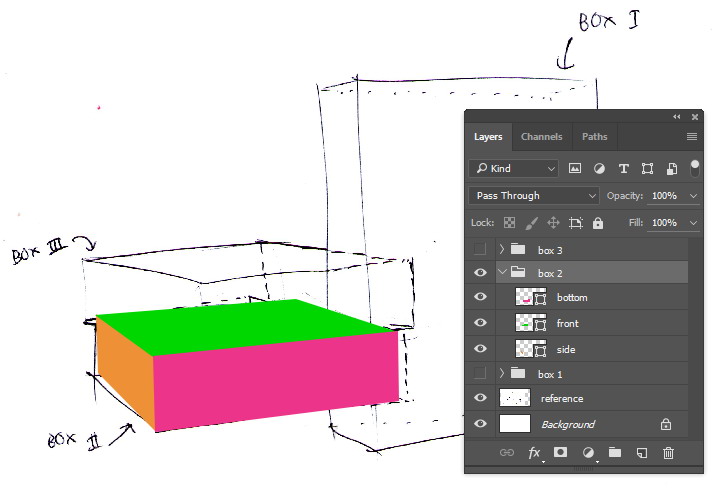
Here, I took my ballpoint and drew a simple sketch of boxes on paper, scanned it, and then exported it to Photoshop.
Make new file, size 1,000 px x 600 px and then paste the scanned image.
Step 2
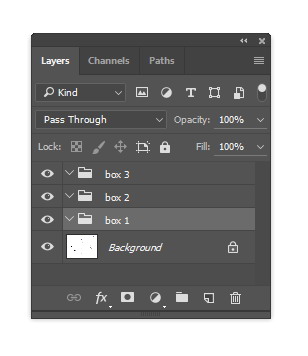
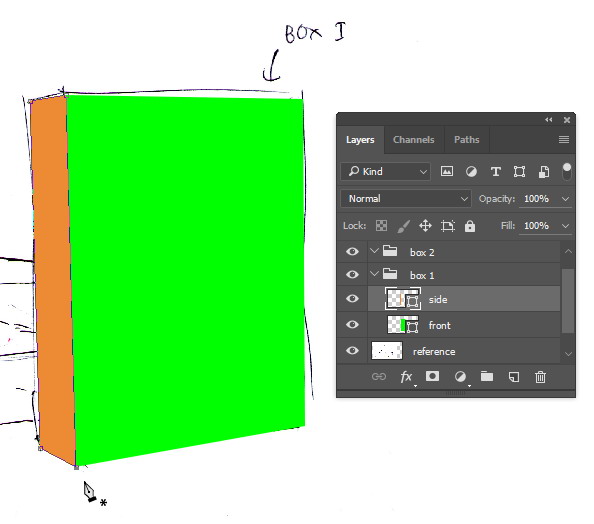
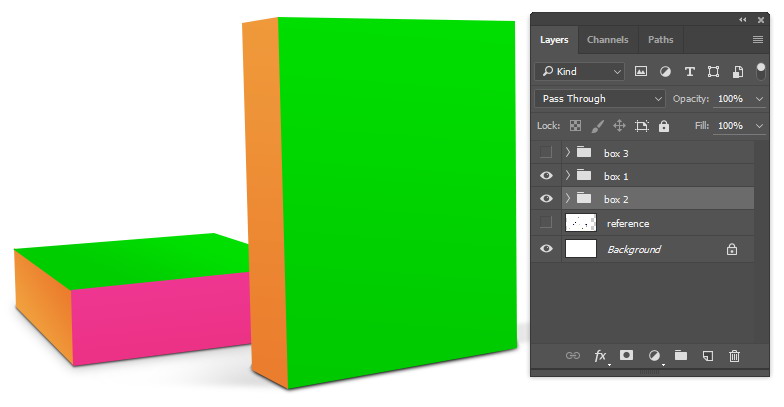
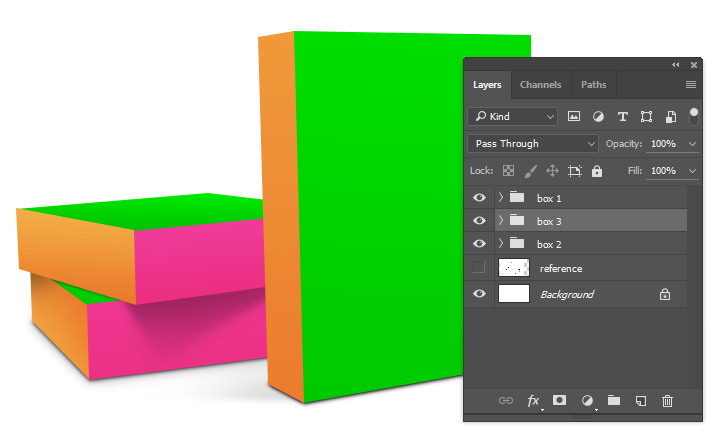
As seen on the reference image, we are going to draw three boxes. We may end up with tens or maybe hundreds of layers so it is always a good habit to keep them organized by keeping layers in appropriate group layers. Hit Ctrl + G to make group layer. Make one for the first box, and then another for the second and third boxes.
Step 3: How to Draw Basic Shapes
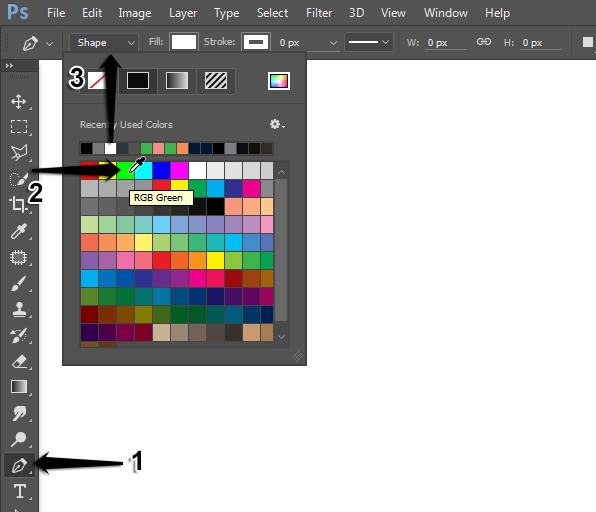
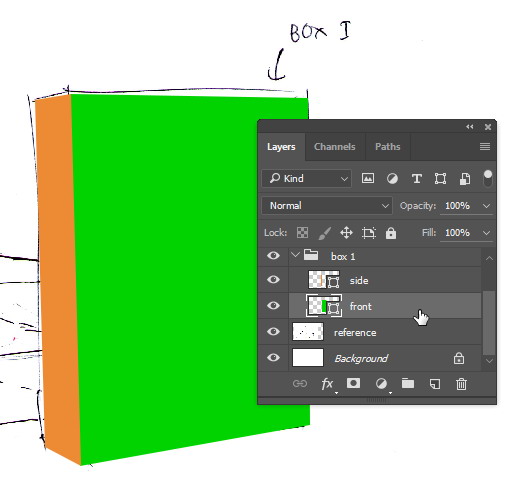
We are going to utilize vector tools for drawing basic shapes. Activate the Pen Tool (P), set its color to any light color, and then select Shape mode in the Options Bar. We use a light color to help us easily differentiate the shape from its background. Any color is acceptable.
Step 4
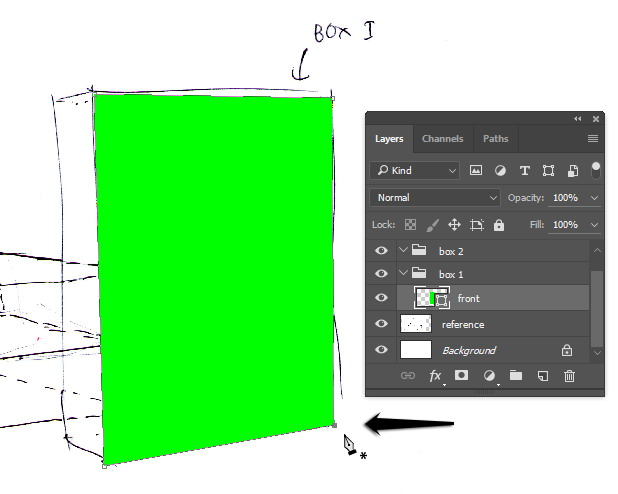
Click to draw the front face of the first box. Make sure you place the shape inside the box 1 group layer.
Step 5
Again, draw the side face of the box. This time use a different light color.
Step 6
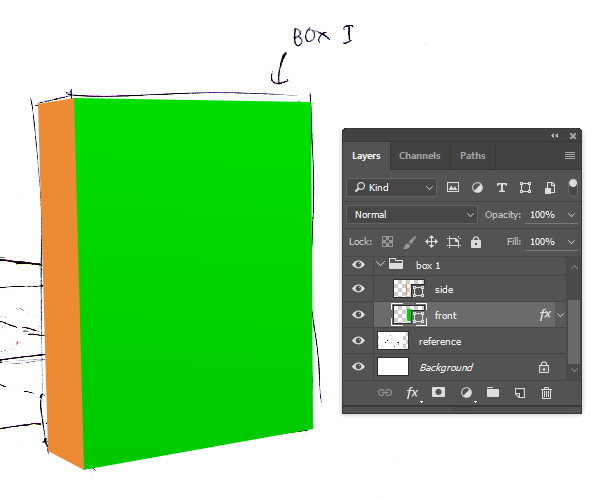
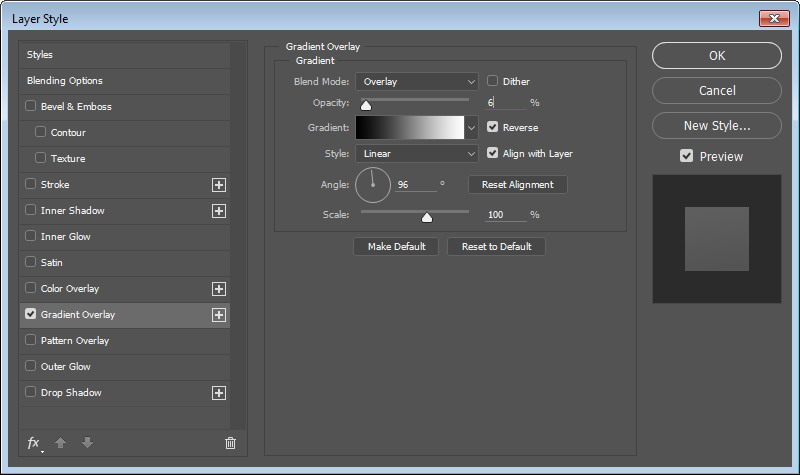
We need to add lighting onto the surface. We prefer to use a Layer Style because it is easily editable. Double click the layer to open up the Layer Style dialog box.
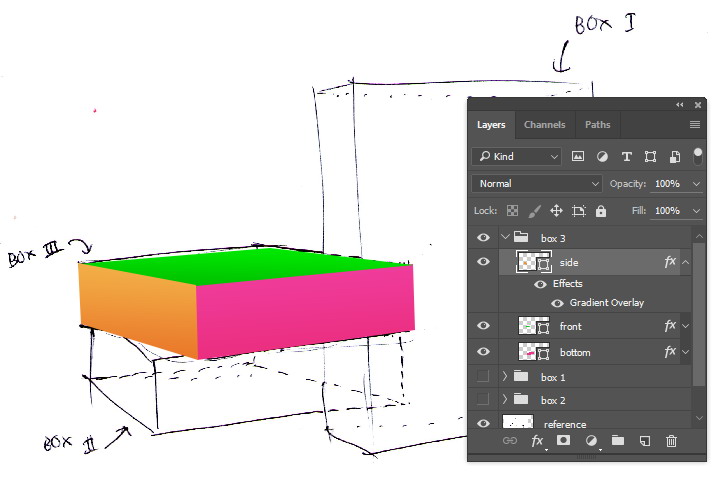
Step 7
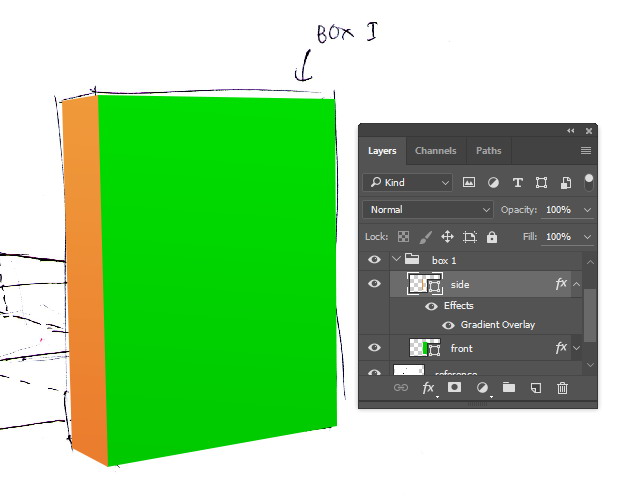
In the next dialog box, activate Gradient Overlay. Use the default black to white gradient with Overlay blend mode. Set the correct angle depending on the imaginary light source position you want to use. The Opacity setting will control the strength of the light source.

Step 8
Repeat the same step to the side face. Add a Gradient Overlay onto its surface.
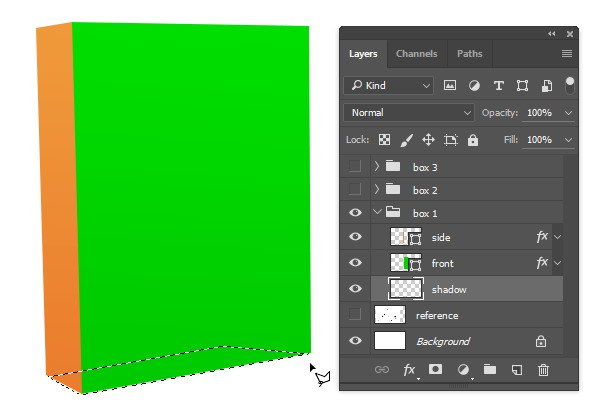
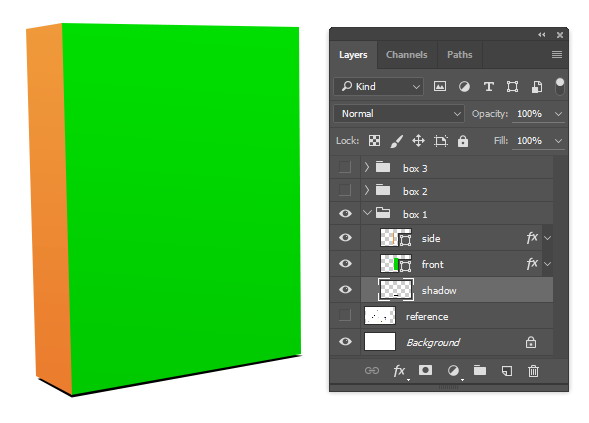
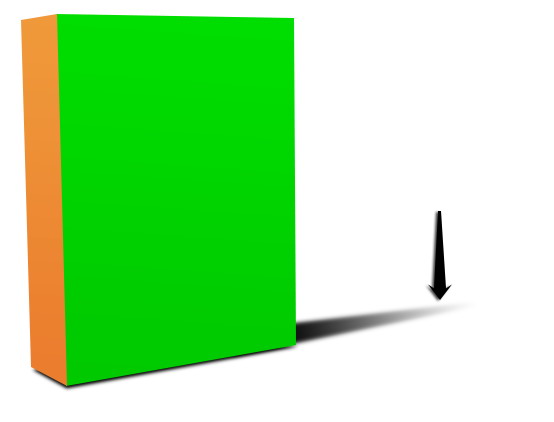
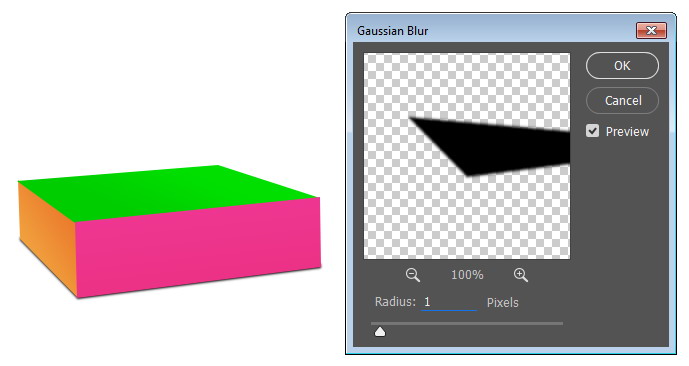
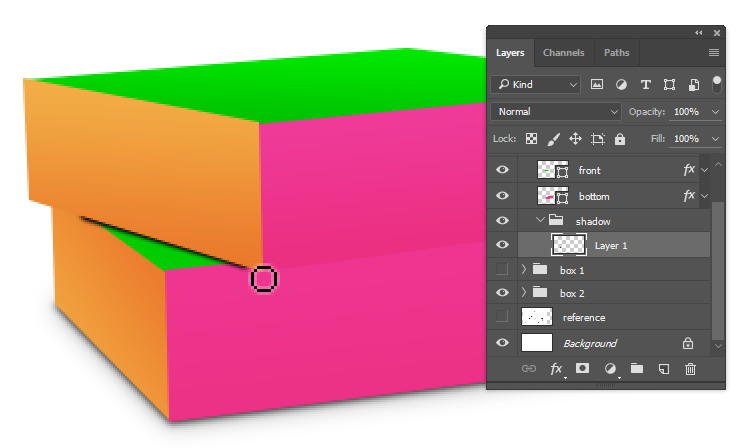
Step 9: How to Draw Shadow
To achieve a realistic scene, we will need to add a shadow underneath the box. Make a new layer and place it below the box’s side. Use the Polygonal Lasso Tool to make a selection underneath the box. Fill the selection with black.
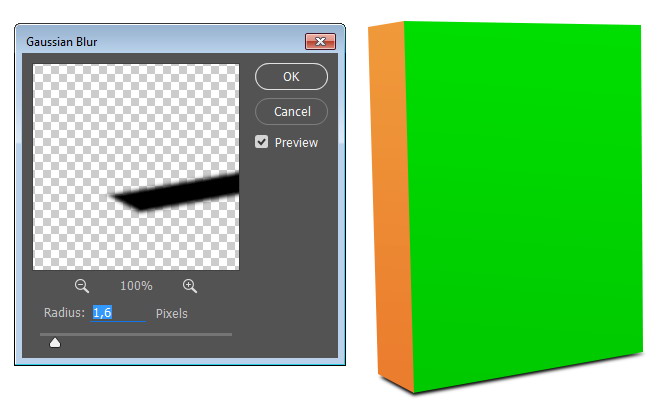
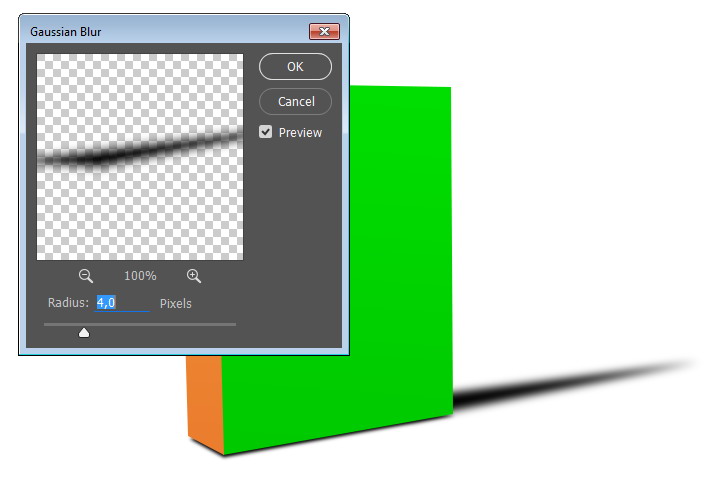
Step 10
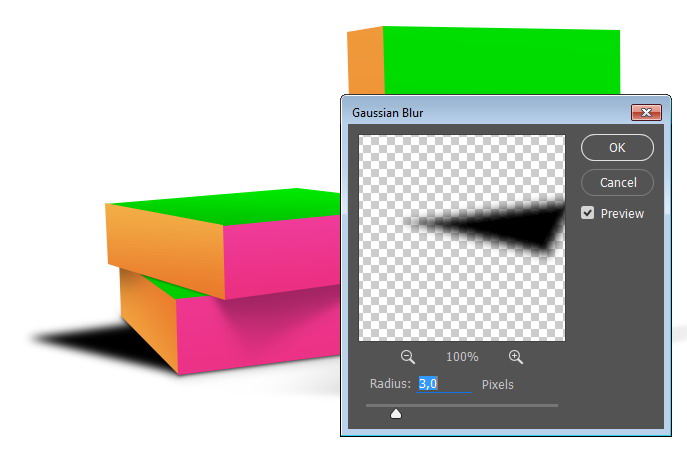
Apply a Gaussian Blur, Filter > Blur > Gaussian Blur. Use enough Radius to soften the shadow.
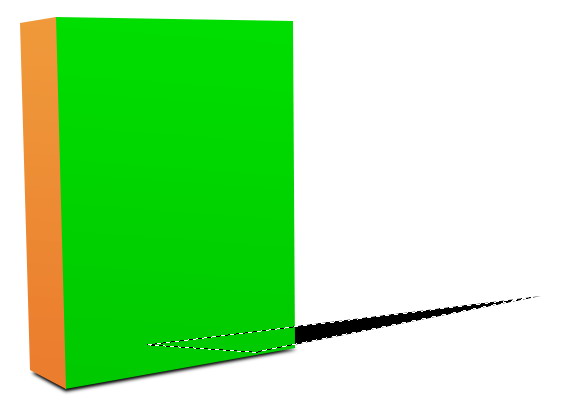
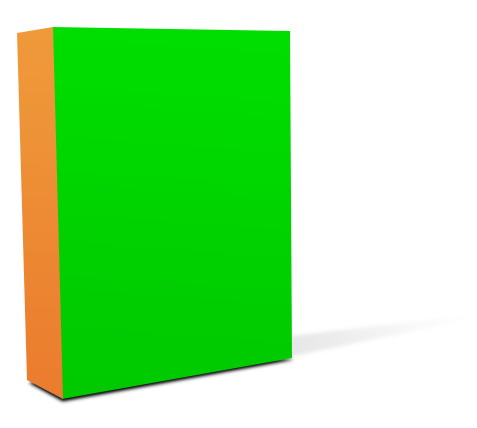
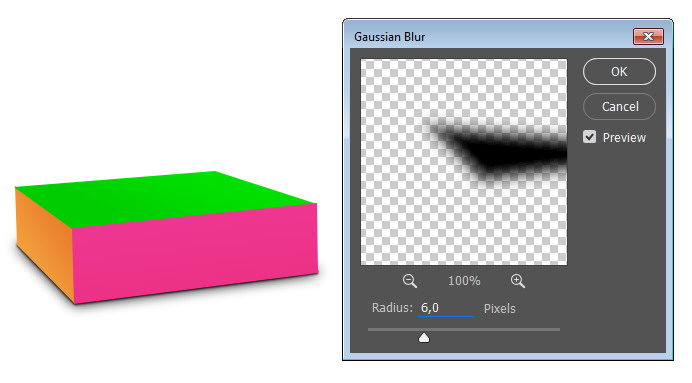
Step 11
In our case, the imaginary light source is placed near enough to the box so that we need to add another soft shadow. Using the Polygonal Lasso Tool, draw a selection and then fill it with black.
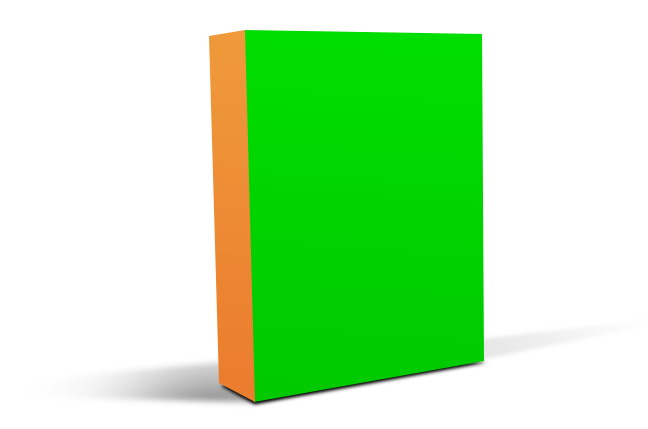
Step 12
Soften it using the Gaussian Blur filter.
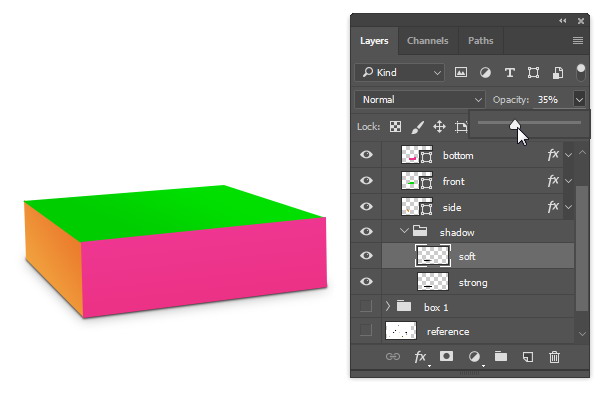
Step 13
Erase the end of the shadow using the Eraser Tool until it fades away.
Step 14
Reduce the layer’s Opacity to 10 or 15%.
Step 15
Repeat the same process to add another faint shadow on the opposite side.
Step 16: Drawing The Second Box
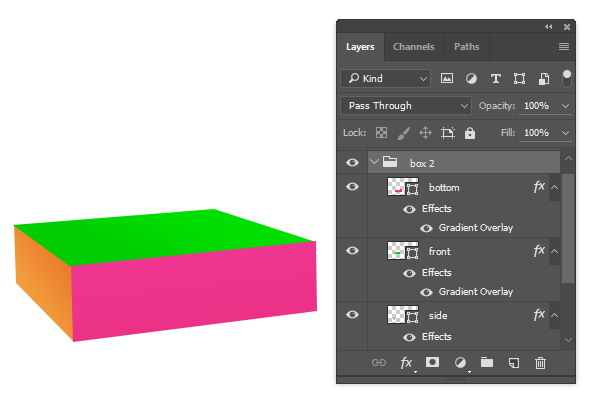
Let’s continue with the second box. Hide the first box by clicking on its eye icon on the Layers Panel. As with the first box, we also need to draw its basic shape first. For this box, we need three faces, which are front, side, and bottom.
Step 17
Just as the previous box, we need to add a Gradient Overlay. You will have to adjust the Angle and Opacity setting to match the light source position and strength.
Step 18
Let’s draw its shadow. Make a new layer and then make a selection underneath the box using the Polygonal Lasso Tool. Fill the selection with black and then soften it using the Gaussian Blur filter.
Step 19
We can enhance the box to appear more realistic by adding a bigger and softer shadow. Duplicate the shadow layer by clicking Ctrl + J. Apply a stronger Gaussian Blur.
Step 20
Tone down its Opacity to keep it subtle.
Step 21
This is the result we have for the two boxes.
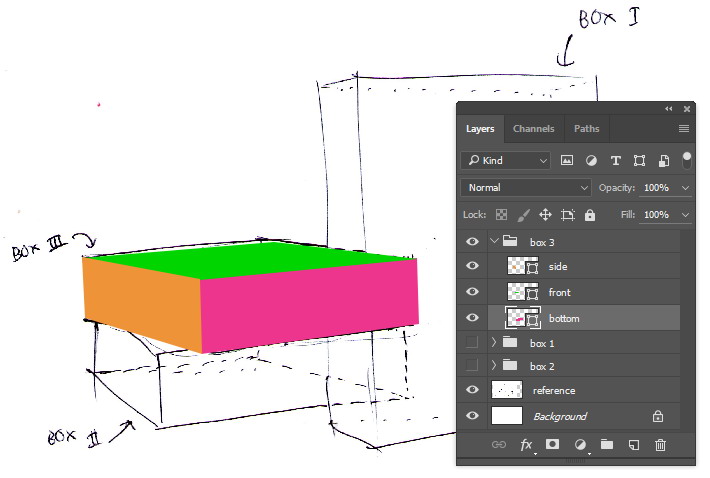
Step 22: The Third Box
We’re moving on to the third box. Draw the shape using the Pen Tool.
Step 23
Add another Gradient Overlay layer style.
Step 24
The third box is stacked on the second box and this makes the shadow a bit complicated. So, reveal the first box to find out where the shadow will fall.

Step 25
Make a new layer. Paint a soft shadow between the second and third box. Use a small brush.
Step 26
Erase any unneeded shadow using the Eraser Tool. You may want to reduce its Opacity to keep the shadow subtle.
Step 27
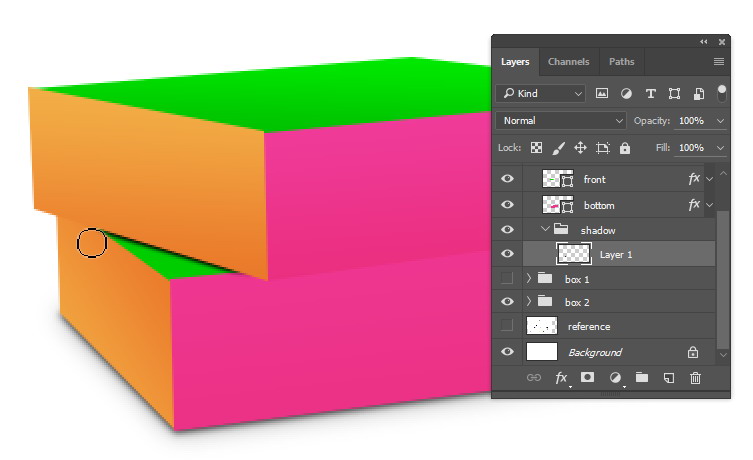
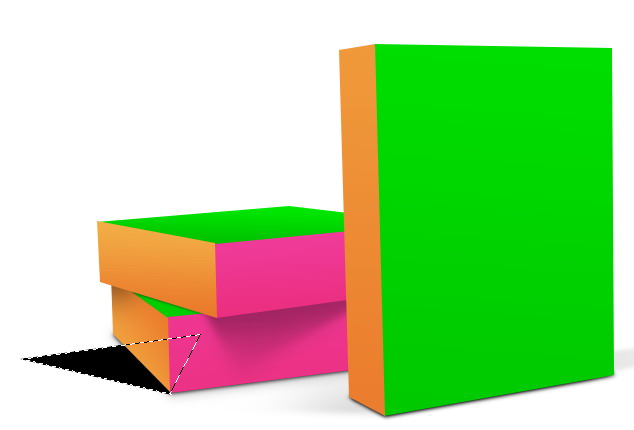
We also need to draw a shadow on the other side of the second box. Draw a selection and then fill it with black. See picture below for reference.
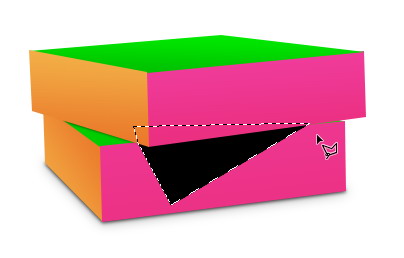
Step 28
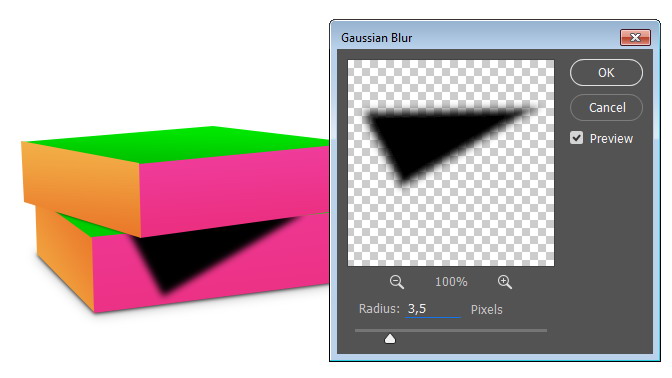
Soften it by applying a Gaussian Blur.
Step 29
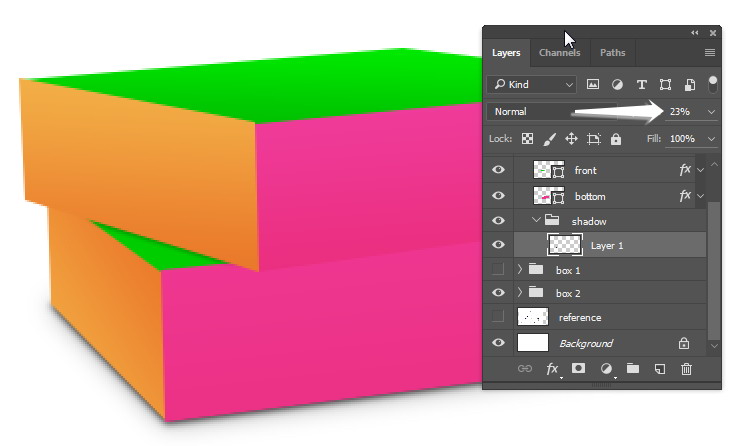
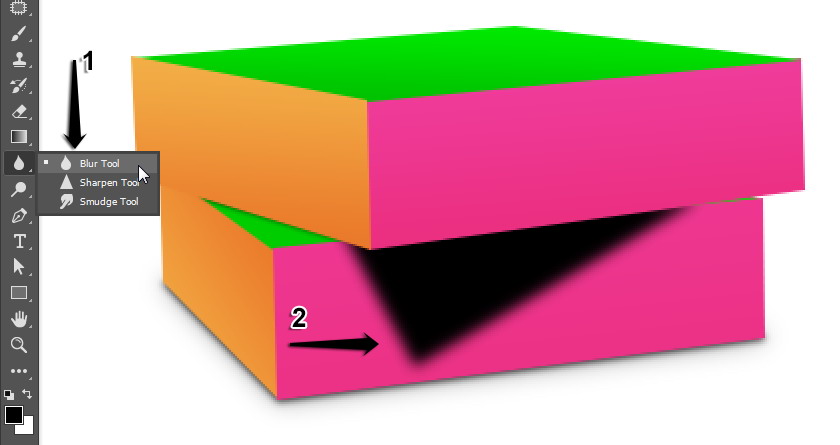
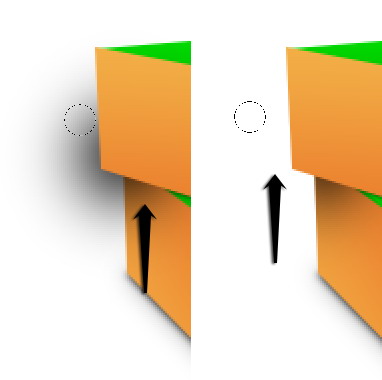
You can use the Blur Tool and the Eraser Tool to paint over the furthest shadow to make it softer. Reduce the layer’s Opacity.

Step 30
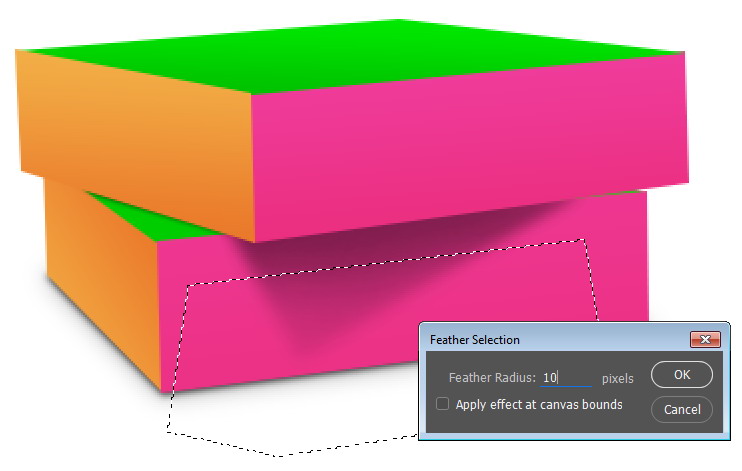
We want it to be a bit softer. Select the furthest part of the shadow. Soften the selection, click Select > Modify > Feather.
Step 31
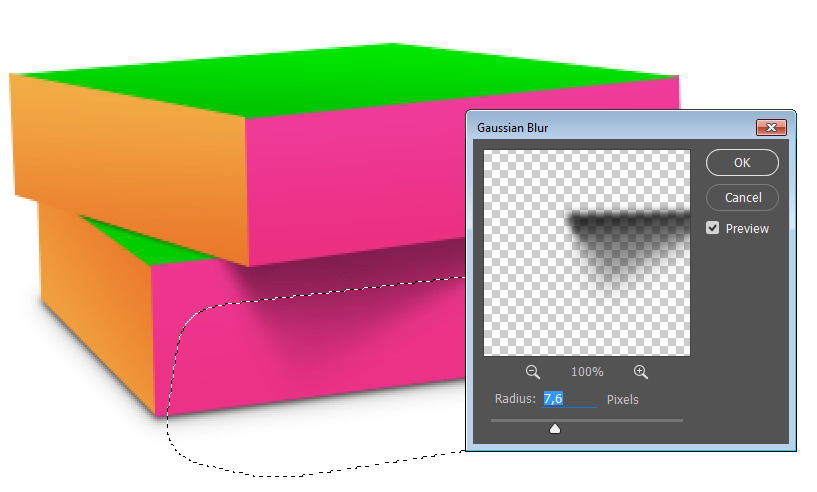
Apply another Gaussian Blur.
Step 32
Make a new layer. Paint another shadow on the opposite side. Erase any unneeded pixels using the Eraser Tool.
Step 33
So far, this is what we have.
Reveal all the boxes to review the final scene.
Step 34
I think we need to add a shadow to the second box. Make another new layer inside the second box group layer. Make a selection, fill it with black, and then soften it by applying a Gaussian Blur.
Step 35
Reduce the shadow’s Opacity.
Step 36: Importing The Designs
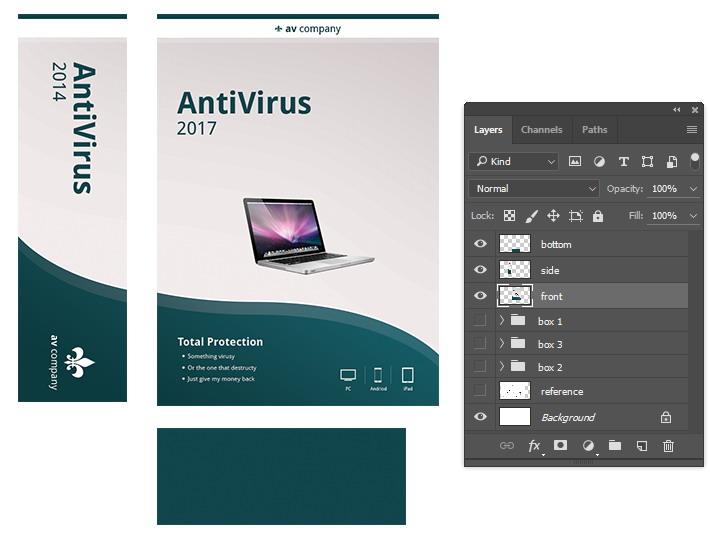
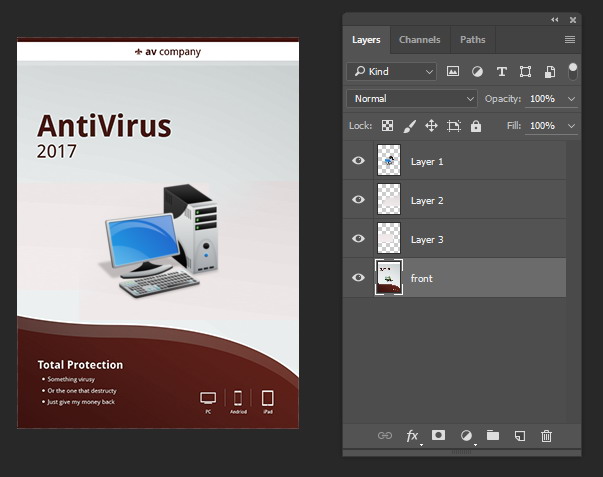
For this mockup, we need three designs which are for the front face, side face, and bottom face.

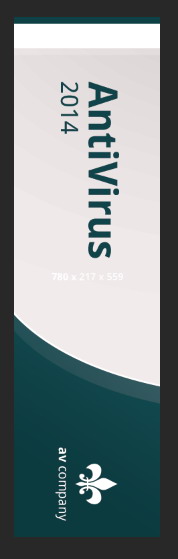
Export each design as one flat layer into the mockup PSD. Its size should be a bit bigger than the face in the mockup. You don’t want it to be too big to prevent jaggies in the transformation process.
These all are the designs we’re going to use in the mockup. They all need to be separated onto their own layers.
Step 37
Convert each design into a smart layer. Right click and select Convert to Smart Object. Do this for each design.
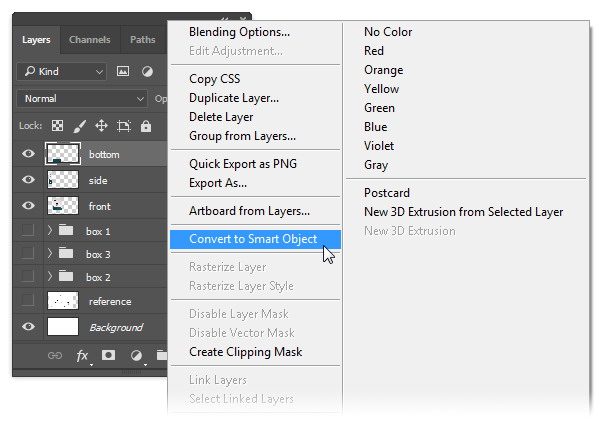
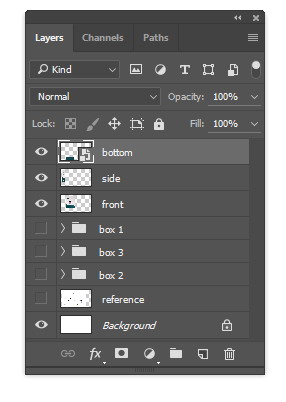
Step 38
For easier handling, put them in a group layer and place it on the upper part of the layer stack. We won’t directly edit them, so we can put them out of sight by clicking on their group layer’s eye icon.
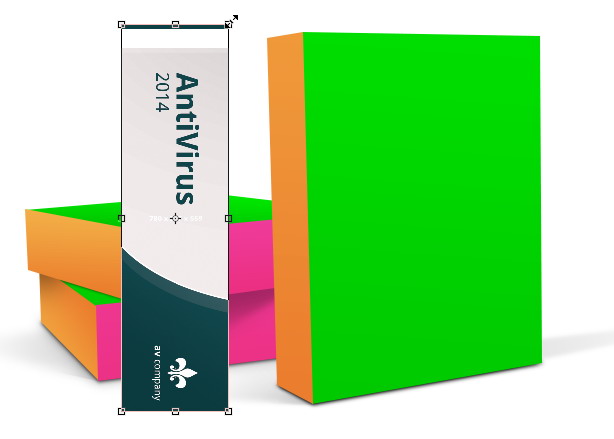
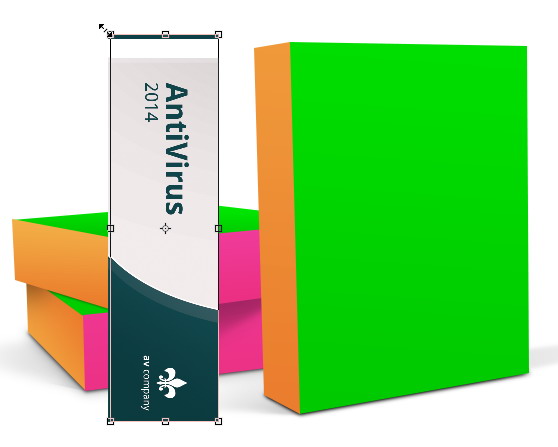
Step 39: Applying Designs Into The Mockup
For the first box, we need front and side face. Duplicate the front and side layer we have exported earlier by hitting Ctrl + J. Place both in the box 1 group layer.
Step 40
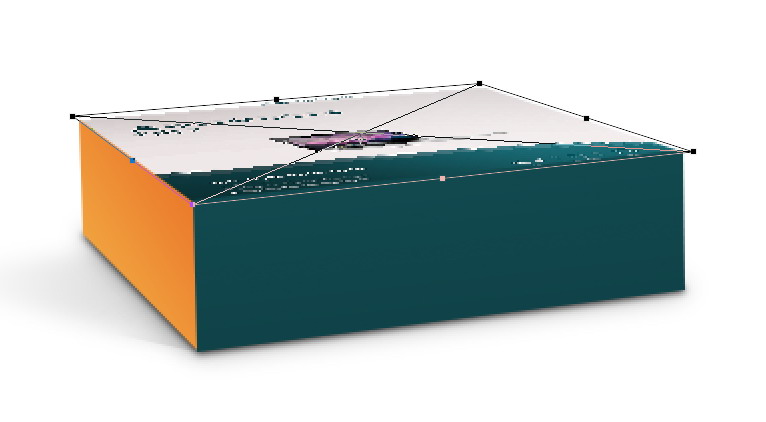
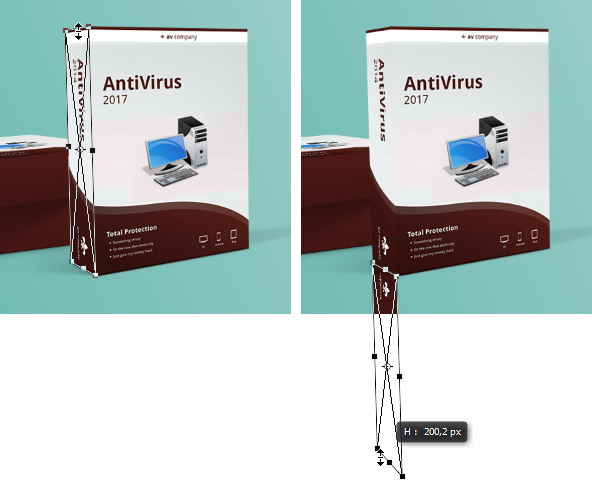
Select the front face layer. Hit Ctrl + T to apply transformation. Right click and choose Distort.
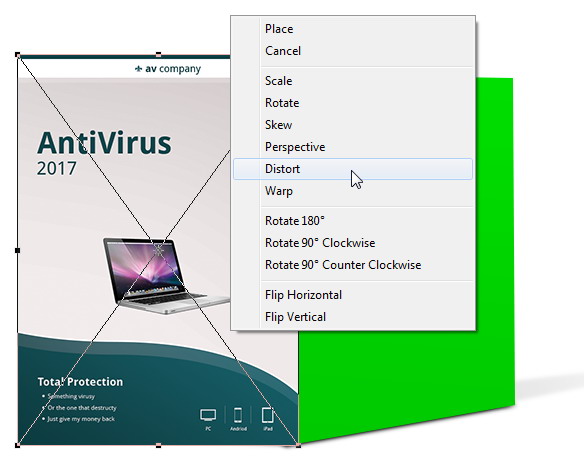
Step 41
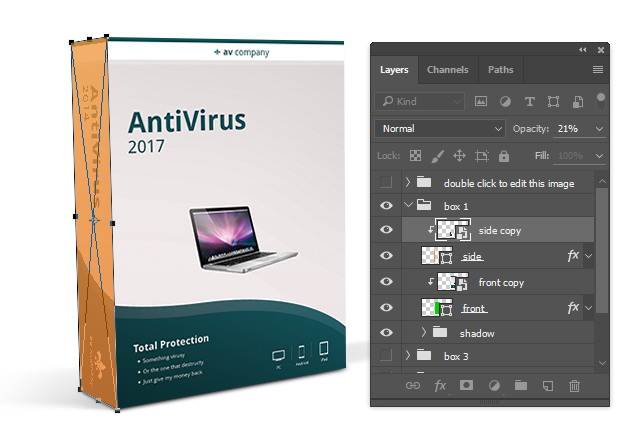
Pull the corner until the box’ front face is covered. It is helpful to reduce the layers’ Opacity so you can see the shape behind it while adjusting the corner. You don’t have to put the corner at exactly the same point. Make it a bit bigger just as in the image below.
Step 42
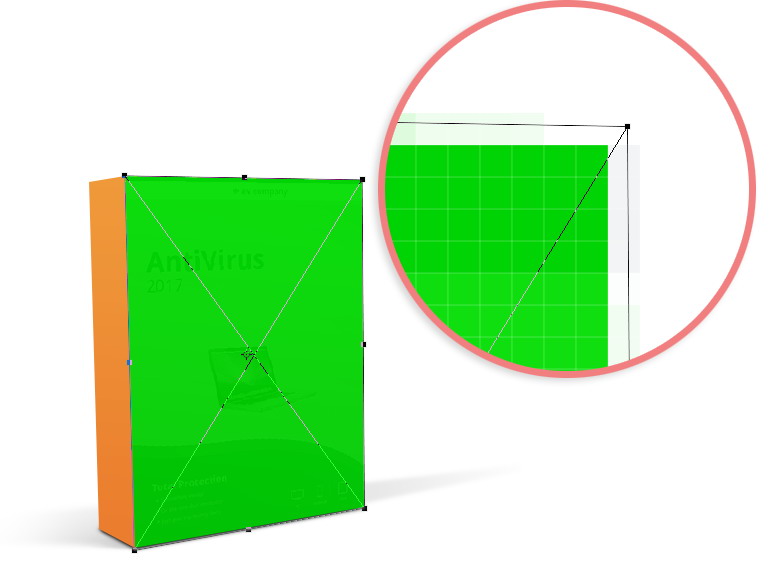
Make sure the front design layer is placed right above the front face layer. Hit Ctrl + Alt + G to convert it into a Clipping Mask. The design will perfectly snap inside the box. Increase the Opacity to 100% again.
Step 43
Repeat the same procedure for the side face.
Step 44
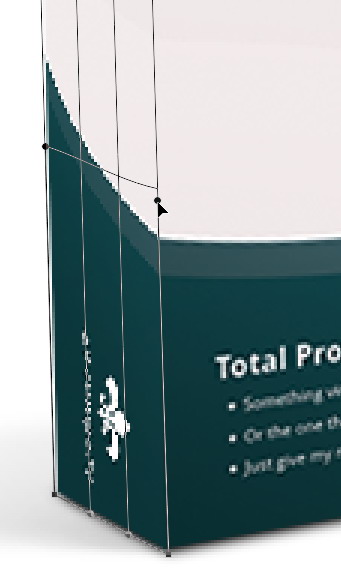
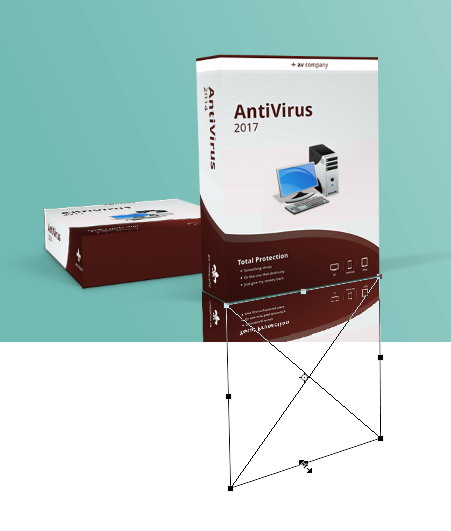
If you look closely, you may find some imperfections on alignment between the two faces. We can fix it by applying another transformation.
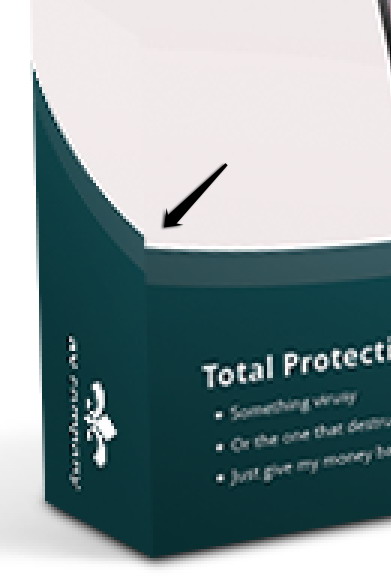
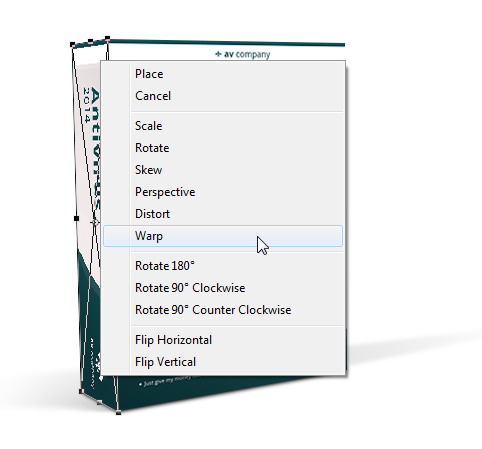
Step 45
Hit Ctrl + T. Right click and then select Warp. Pull the appropriate points to fix their alignment.

Step 46
Repeat previous steps to add the design onto the second box’ faces.
Step 47
This goes on to the third box.
Step 48
We’re pretty much done now. But there are some tricks we can add to enhance this mockup.

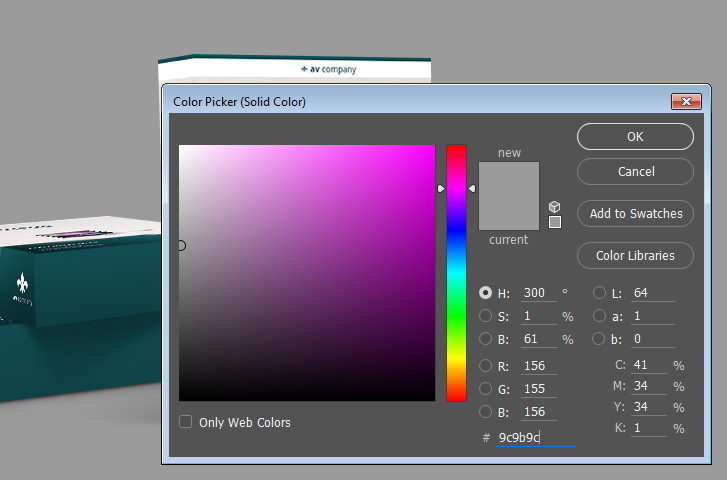
Step 49: Easy Way to Change The Mockup’s Background Color
We need to add an easy way to change the mockup’s background. Add an Adjustment Layer Solid Color by clicking white and black circle icon at the bottom of the Panel Layers. Select gray color in the pop up dialog box.
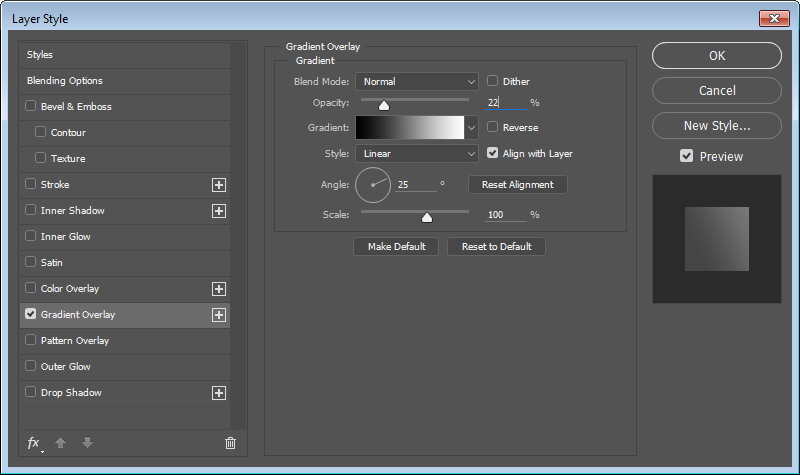
Step 50
Add a Gradient Overlay to the adjustment layer we have just added earlier.

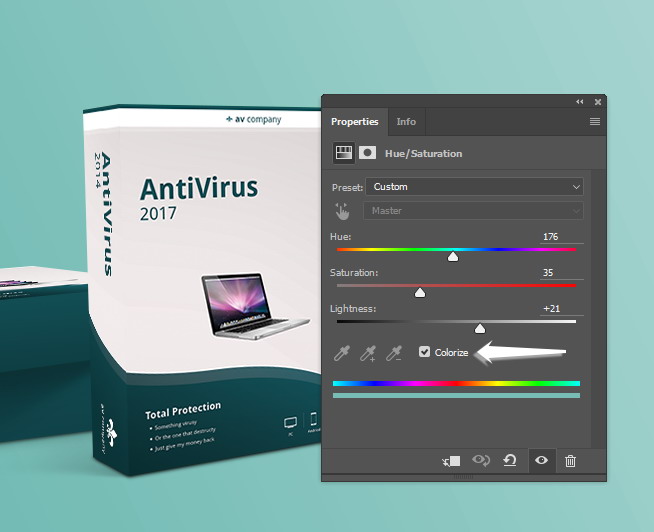
Step 51
Above the Solid Color adjustment layer, add Adjustment Layer Hue/Saturation. Select the Colorize option. Just by sliding the available sliders, now you can easily change the background color.
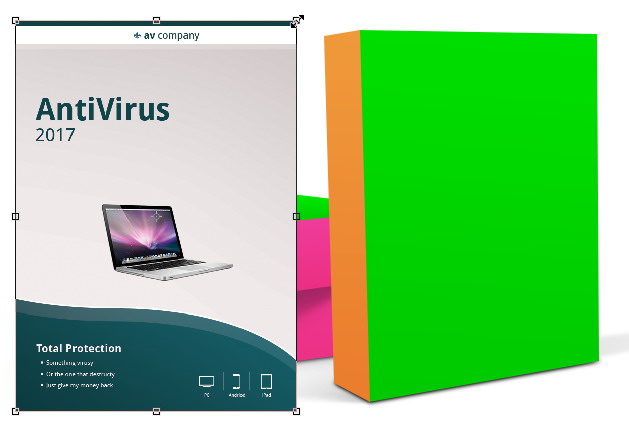
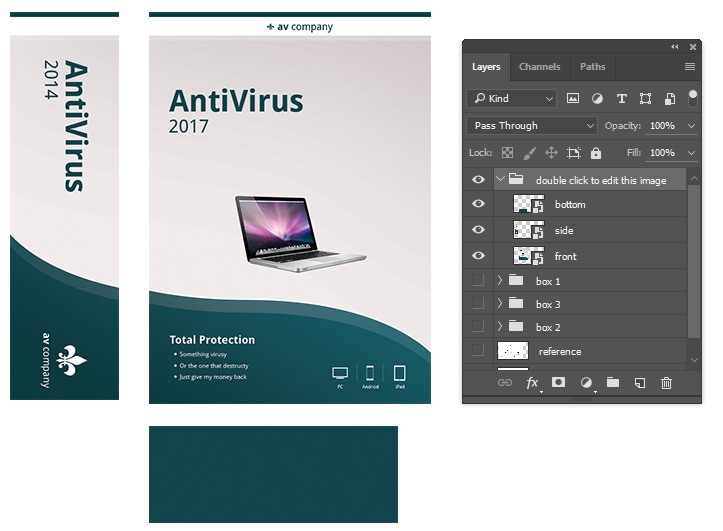
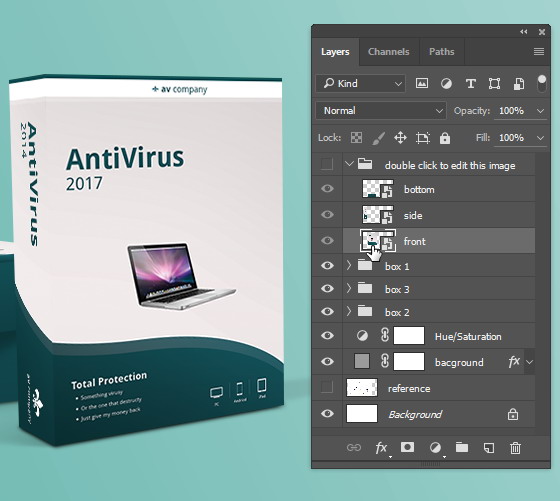
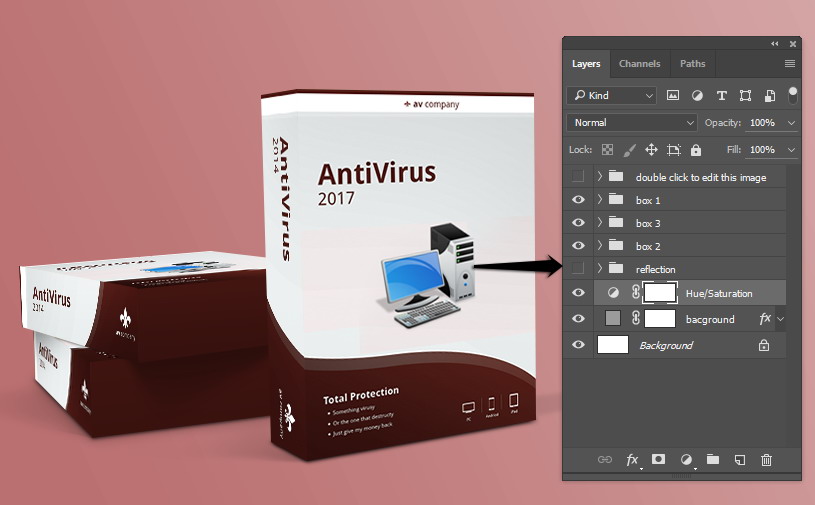
Step 52: How to Edit the Design Content
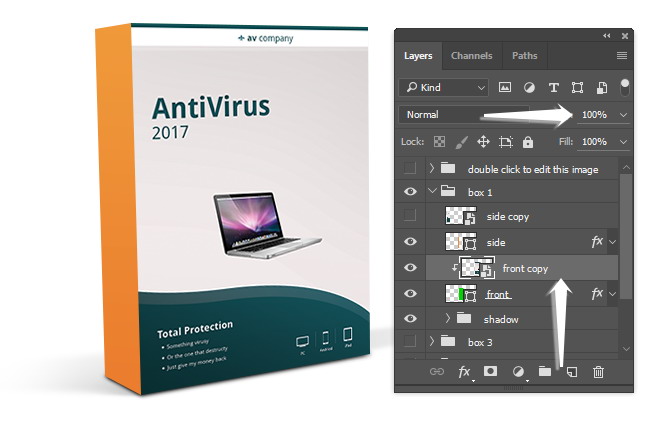
Let’s go for a test drive. To change the front face design, double click the front smart layer.
Step 53
The front face design is opened as a separate individual file. Edit this design anyway you like. Here, I changed the color theme and added an icon from iconfinder.
Step 54
Save the new design and then close it. Return to the mockup PSD file. You will find that the front design is automatically updated. All three of them.

Step 55
Continue editing the other faces.

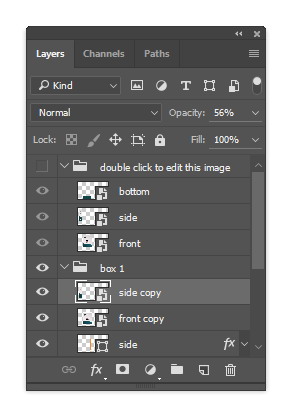
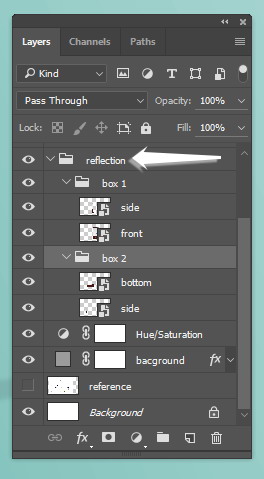
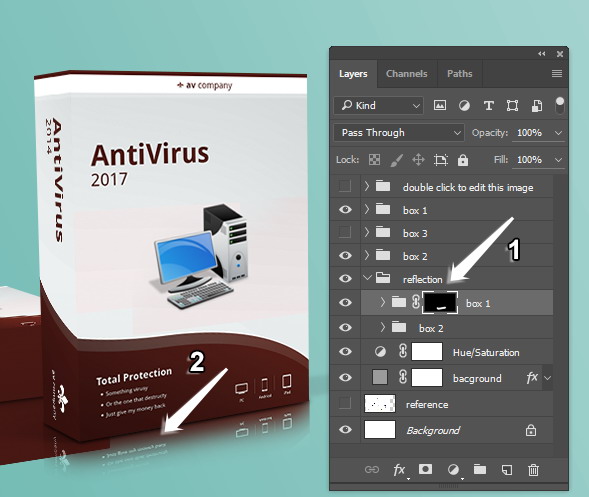
Step 56: Adding Reflections
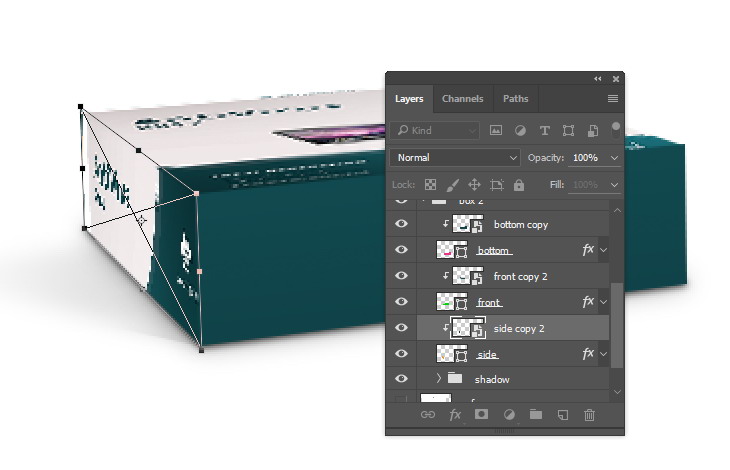
As you can see, we are technically done designing the mockup. But, we can enhance it further by adding reflections. In the current scene, we need four faces for the boxes’ reflection, which is the front and side face of the first box and the side and bottom face of the second box. Duplicate those layers by selecting each and clicking Ctrl + J.

Step 57
Put them all in an appropriate group layer which is nested in another group layer for easier layer management.
Step 58
Activate the side face of the first box and then hit Ctrl + T to enter the transformation process. Since this is a smart layer, we can still have the original transformation bounding box. All we need to do is just drag the top center handle downward. Once we’re satisfied with the result, hit the Enter key.
Step 59
Do the same for its front face.
Step 60
You already know the drill, get on with the second box.

Step 61
Take a closer look and you may find a gap between the reflection and its original face. Of course, we don’t want it. You can just simply move them up a bit until it is completely covered by the real box.
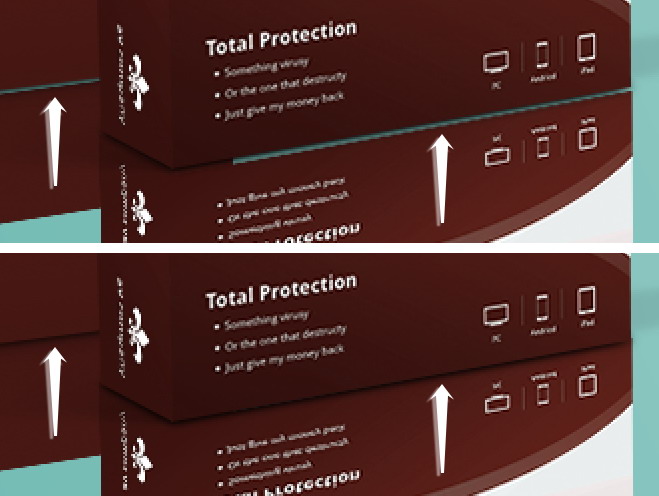
Step 62
Add a mask to the reflection group layer of the first box. Fill it with black to hide everything and then paint over areas right below the box to reveal the reflection. Make sure you use soft and big Brush.
Step 63
Do the same for the second box’s reflection.

Step 64
Reduce the Opacity of the main reflection’s group layer to keep its appearance subtle.
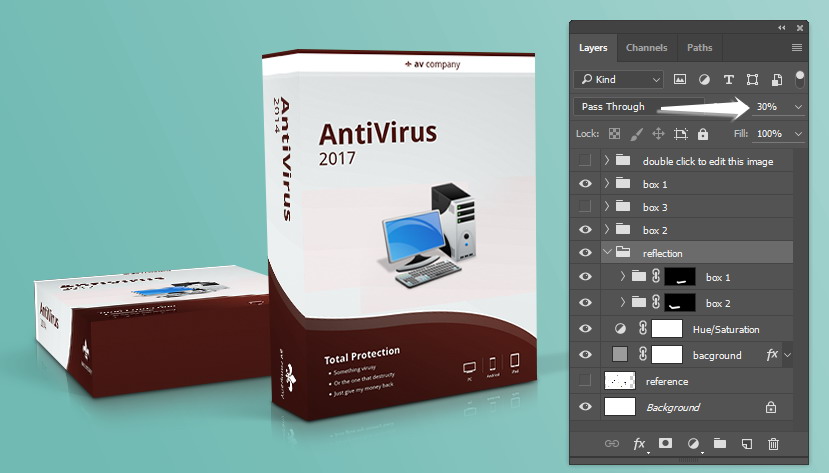
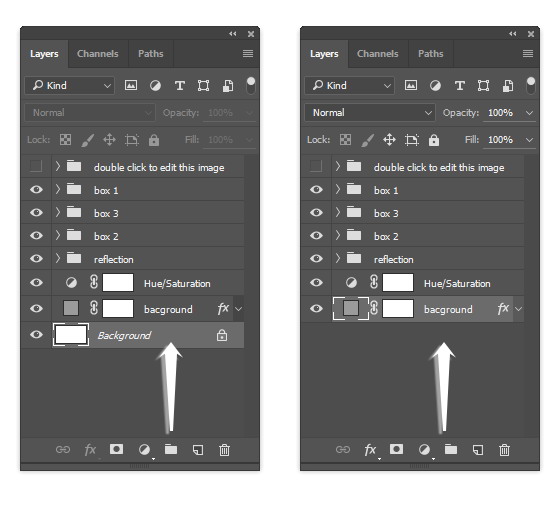
Step 65: Optimizing The Mockup File
So far, this is the current layer’s configuration. We need to optimize the layers to keep the file as small and effective as possible.
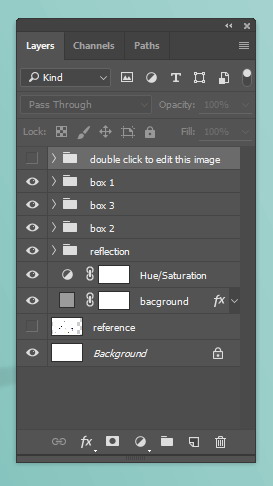
Step 66
First thing we can do is flatten the complicated image into a single layer. The shadows were made from a few layers. Right click the layers and hit Ctrl + E to merge them into one flat layer. If they have been organized into a group layer, you can directly right click its group layer and then hit Ctrl + E.
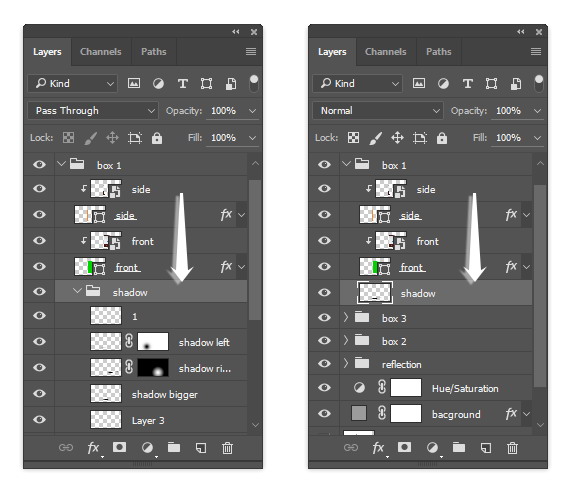
Step 67
We also don’t need the original Background. We already have an adjustment layer Solid Color background We can just delete it by dragging Background onto the recycle icon.
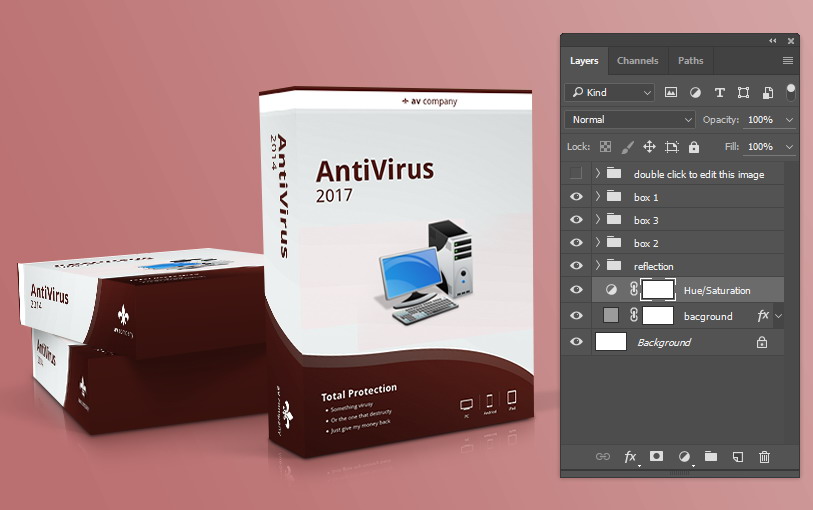
Step 68: The Many Possibilities of Scenes in the Mockup
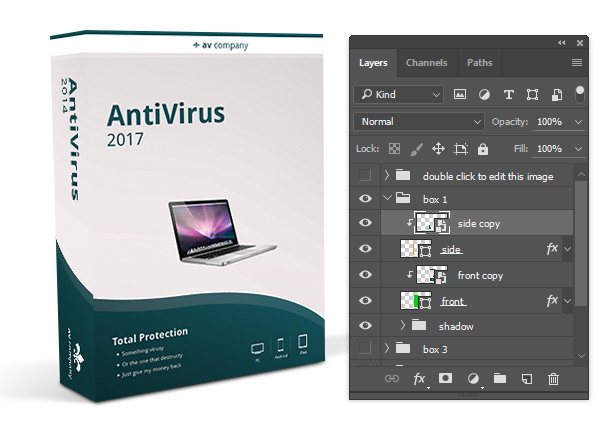
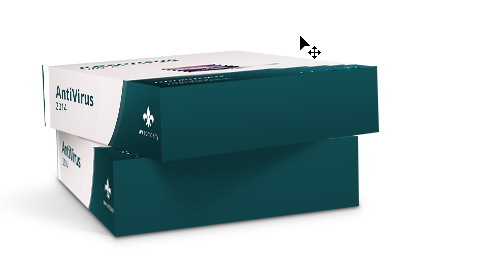
Yes, we’re done! This is our final result. Complete with reflection and other enhancements. There are many possibilities for this mockup.
Here, we hide the reflection by removing the eye icon from its group layer.
We can only show two boxes, second and first, by clicking on the eye icon of the third box.

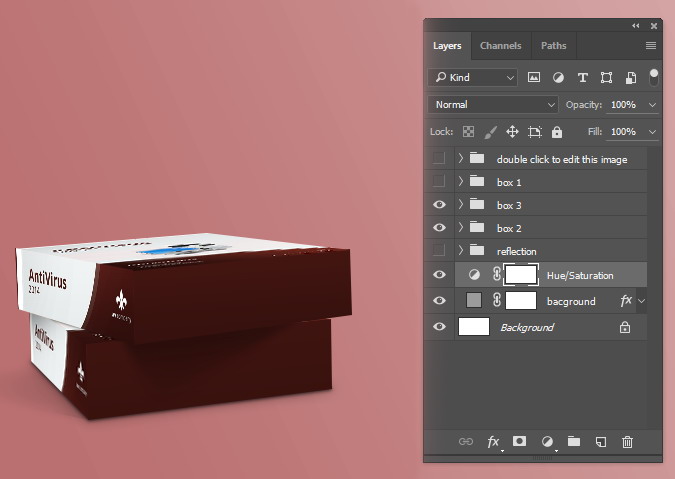
If we want to, we could just hide the second and third boxes.
Or maybe show the second and third boxes only.
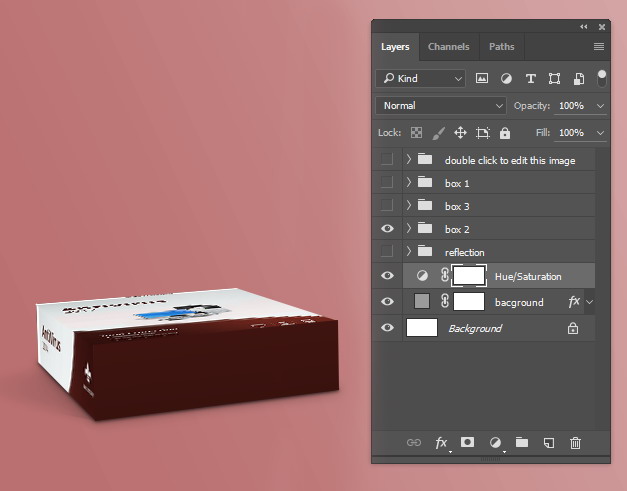
Just need the second box? You have it. Of course we can not show the third box alone because it will be awkward.
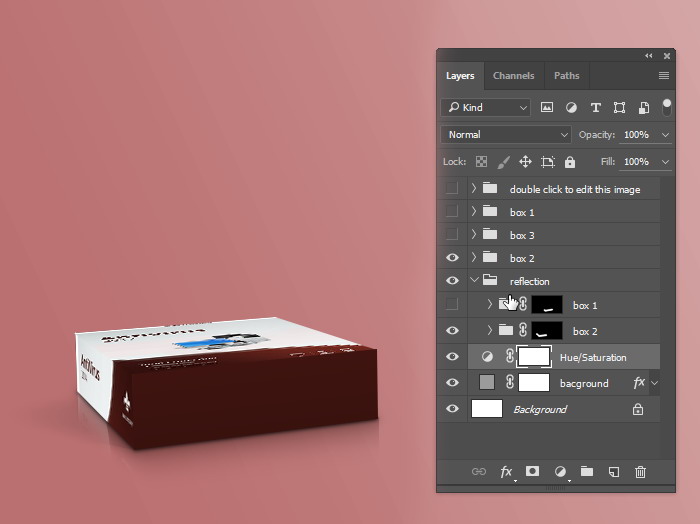
You can also reveal the reflection of the second box.
Final Result
There you go. As you can see, making your own mockup is not so hard. I hope you learned new techniques from this tutorial, especially on building a compact but flexible mockup. You can also freely use the mockup that is available in this tutorial for your projects.