In this tutorial I’ll show you how to create a haunted house scene with Photoshop.
You’ll learn how to combine different images together, add moonlight and create a dark and haunting atmosphere.
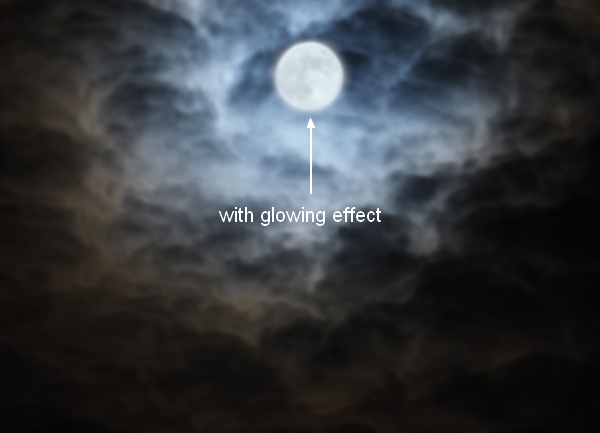
Final Image

Tutorial Details
- Program : Photoshop CS3+
- Estimated Completion Time : 90 minutes
- Difficulty : Intermediate
Resources
Step 1
Create a new document in Photoshop with the following settings:
Step 2
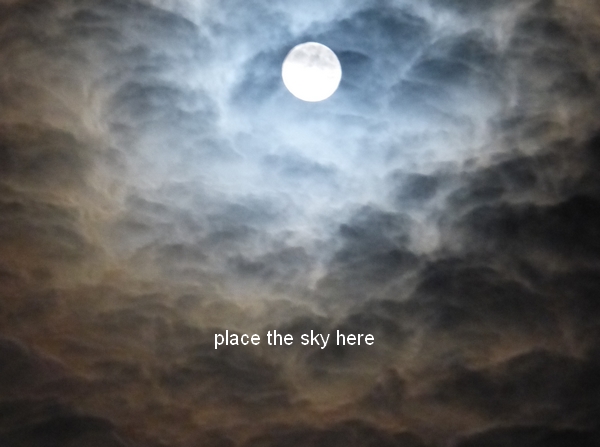
Open the sky image. Drag it into the white canvas using the Move Tool (V) :
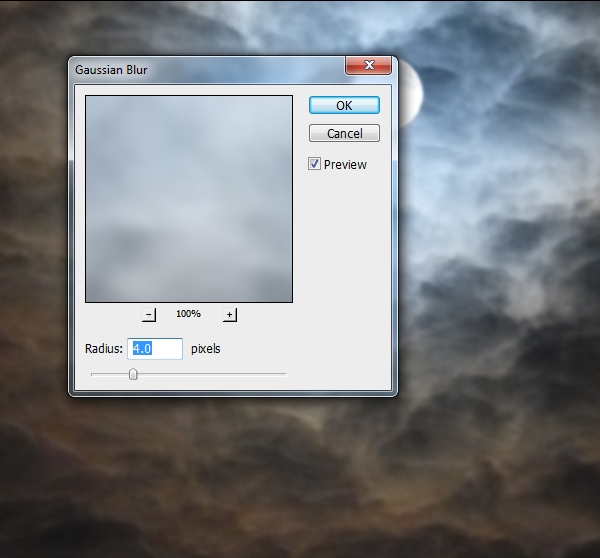
Go to Filter > Blur > Gaussian Blur and set the radius to 4px to soften the sky a bit:
Step 3
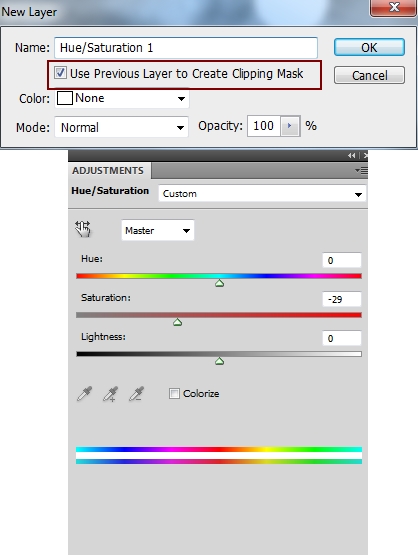
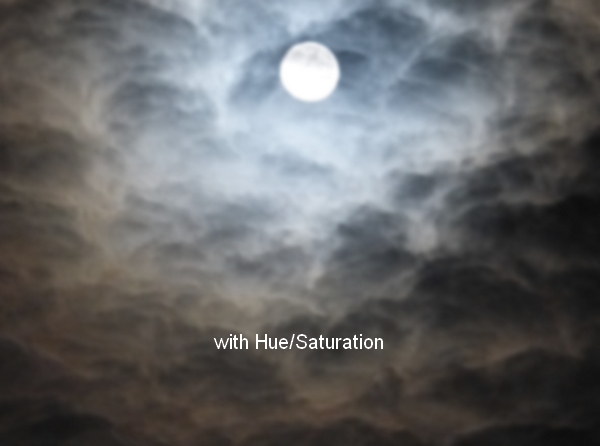
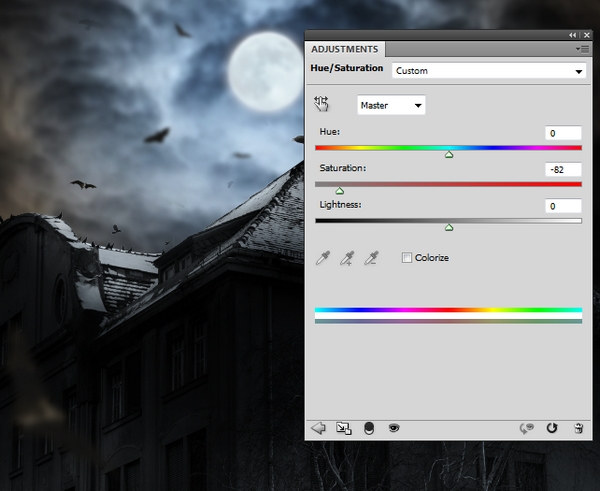
Use an adjustment layer and set it as Clipping Mask to change the sky color a little. Go to Layer > New Adjustment Layer > Hue/Saturation :
Step 4
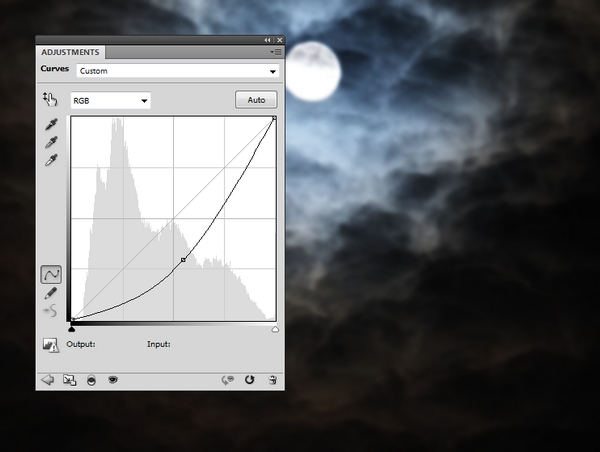
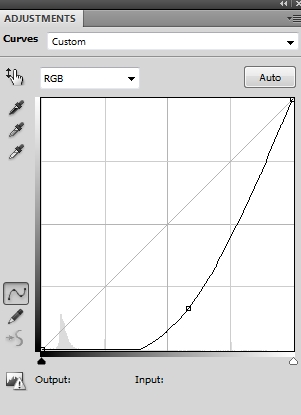
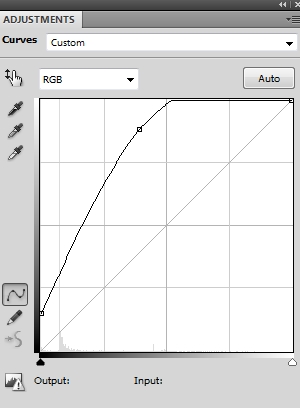
Use a Curves adjustment layer to darken the sky:
Step 5
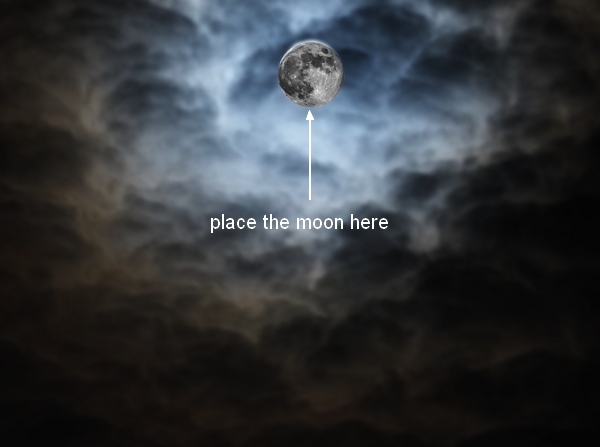
Cut out the moon from the original image and place it onto the top middle of the sky:
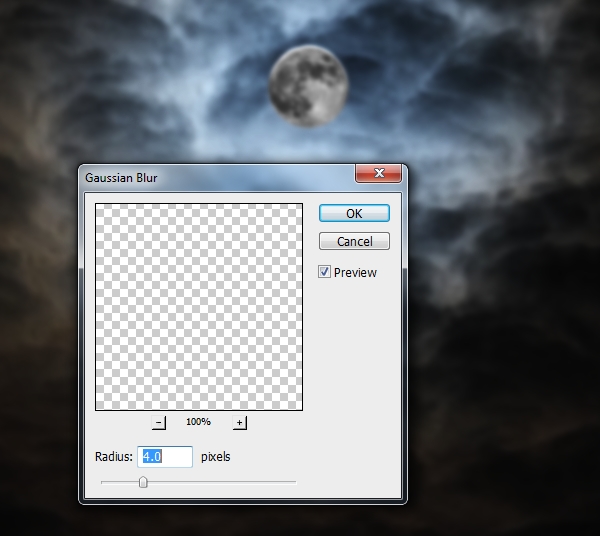
Apply a Gaussian Blur of 4px to the moon:
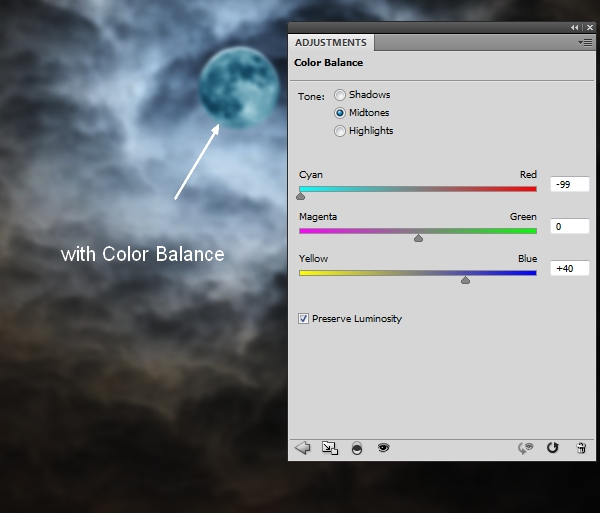
Step 6
Create a Color Balance adjustment layer (set as Clipping Mask) to change the moon color:
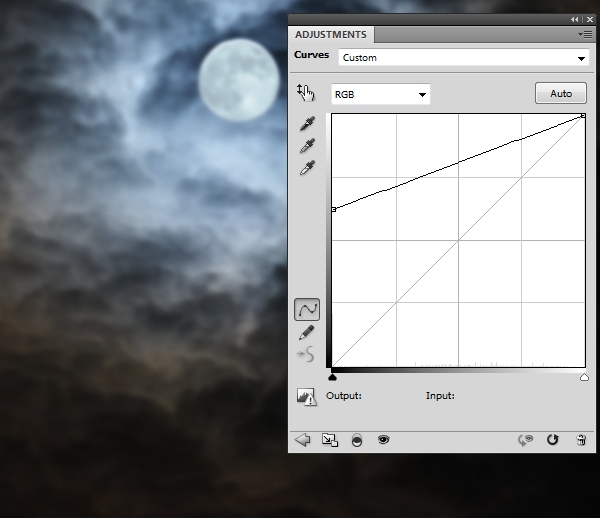
Use a Curves adjustment layer to brighten the moon as it looks too dark now:
Step 7
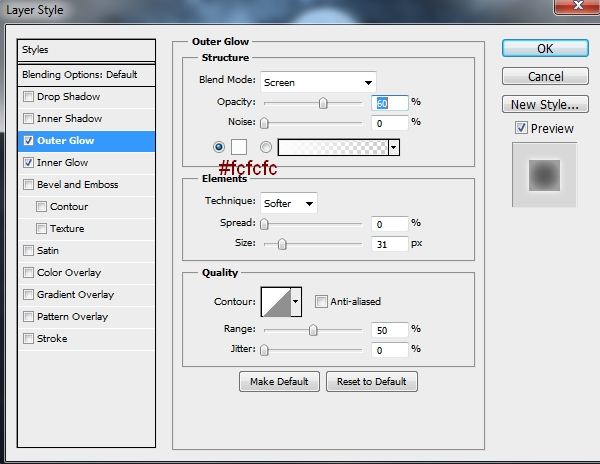
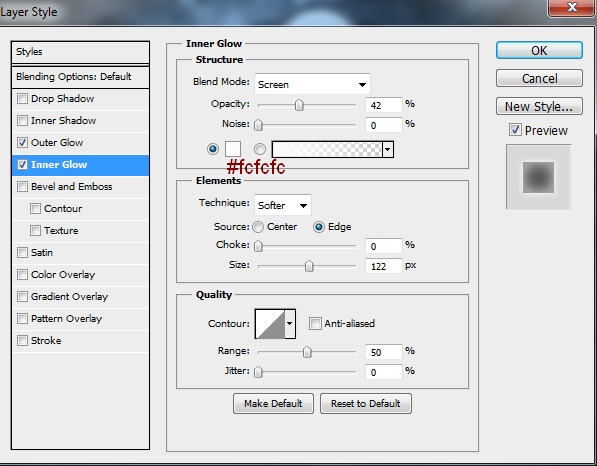
To add a glowing effect to the moon, double click the moon layer, choose Outer Glow and Inner Glow :
Step 9
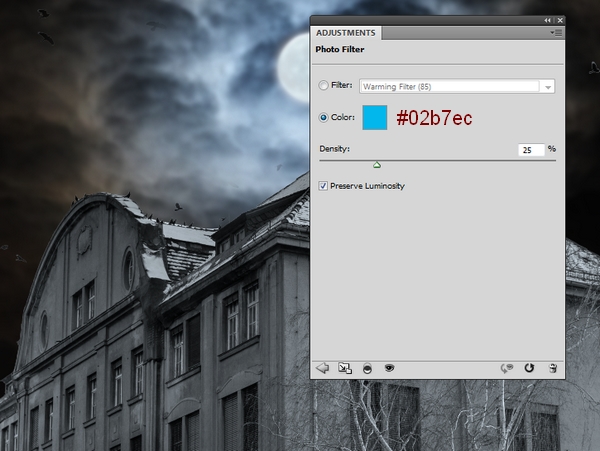
Make a Photo Filter adjustment layer (set as Clipping Mask) to change the house color:
Step 10
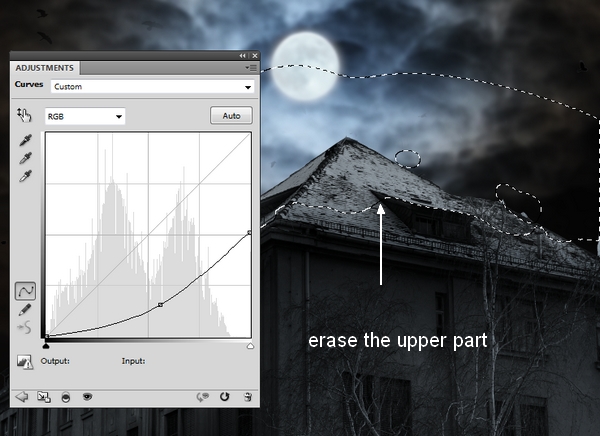
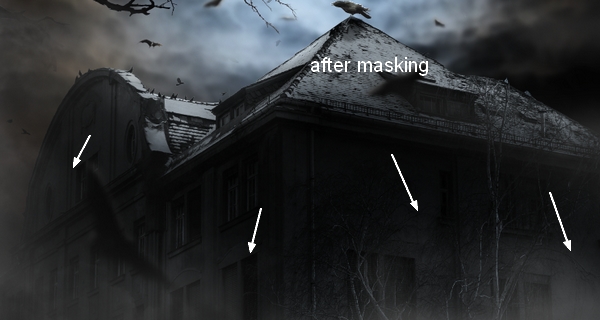
Use a Curves adjustment layer to darken the house. On its layer mask, use a soft black brush to erase the upper part as it gets light from the moon:
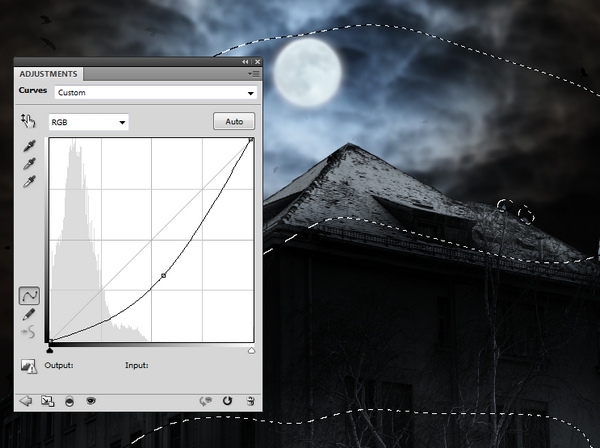
Add another Curves adjustment layer to darken the lower part of the house. On this layer mask, use a soft black brush to erase the selected parts below:
Step 11
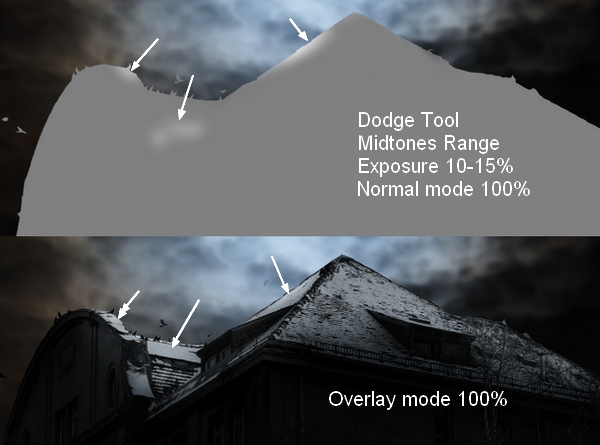
Make a new layer, change the mode to Overlay 100% and fill with 50% gray:
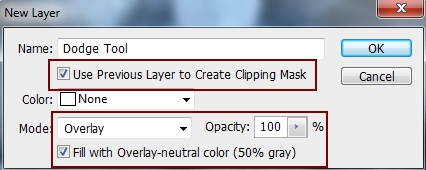
Activate the Dodge Tool (O) with Midtones Range, Exposure about 10-15% to brighten some areas of the roof. You can see how I did in Normal mode and the result in Overlay mode:
Step 12
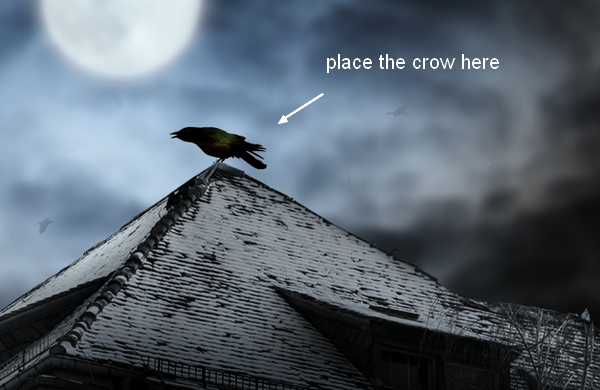
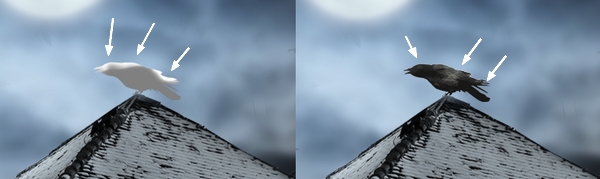
Isolate the crow from the original image and place him onto the roof:
Step 13
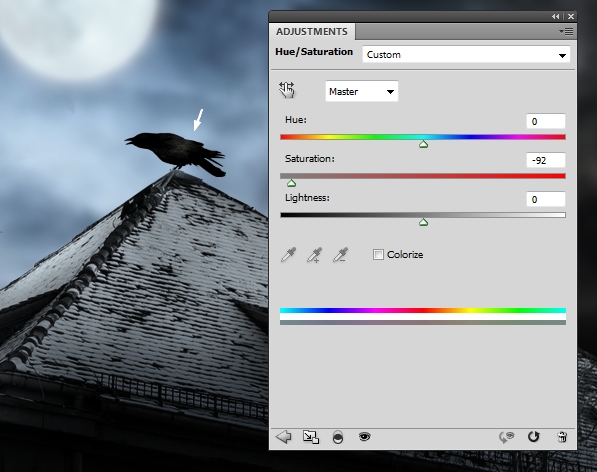
Use a Hue/Saturation adjustment layer (set as Clipping Mask) to desaturate the crow :
Step 14
Use a Curves adjustment layer to brighten the crow:

Step 15
Make a new layer with the settings as in step 11. Use the Dodge Tool to brighten the upper part of the crow:
Step 16
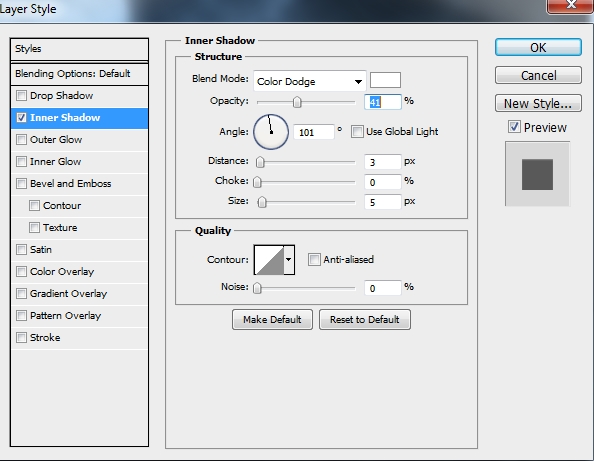
Double click the crow layer, choose Inner Shadow and pick white for the color of the shadow:
Step 17
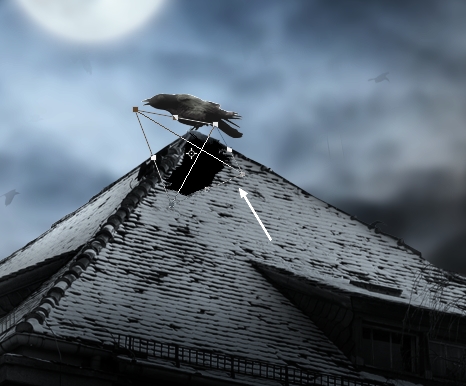
To make a shadow for the crow, create a new layer under the crow layer. Hold the Cmd/Ctrl and click the crow thumbnail layer to load its selection:
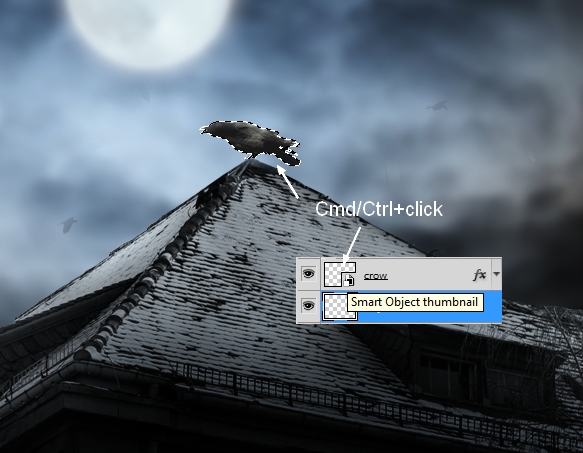
Fill this selection with black and flip it vertically (Edit > Transform > Flip Vertical) . Move it under the crow’s feet and use the Free Transform Tool (Cmd/Ctrl+T) to tweak it as shown below:
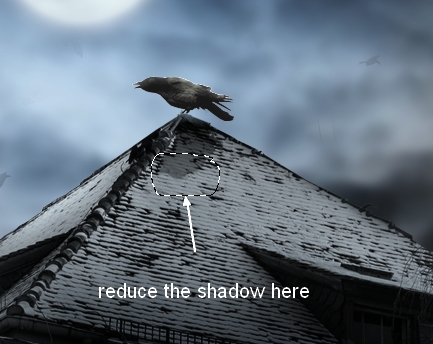
Lower the opacity to 70% and use a layer mask to reduce the shadow intensity at the top:
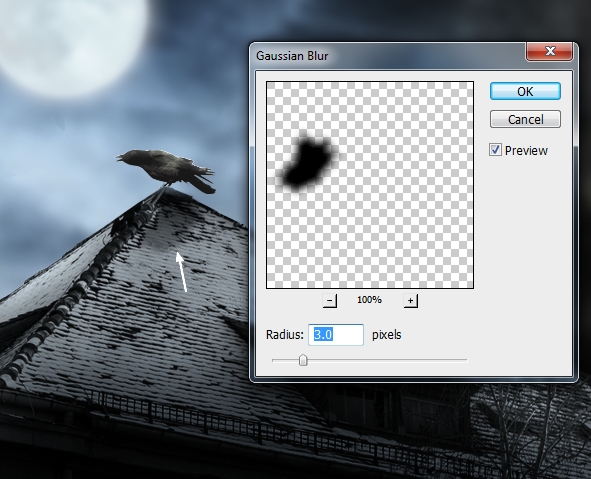
Apply a Gaussian Blur of 3px to soften the shadow:
Step 18
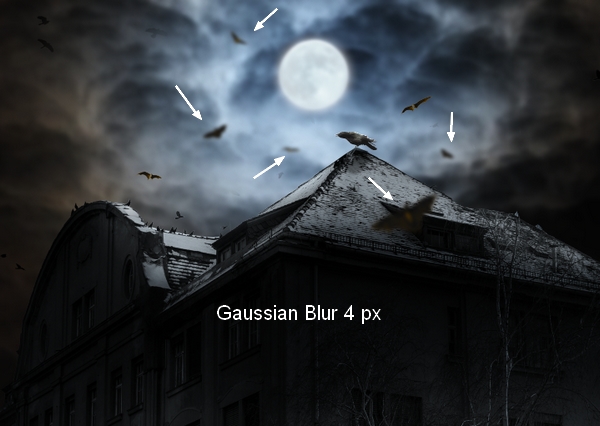
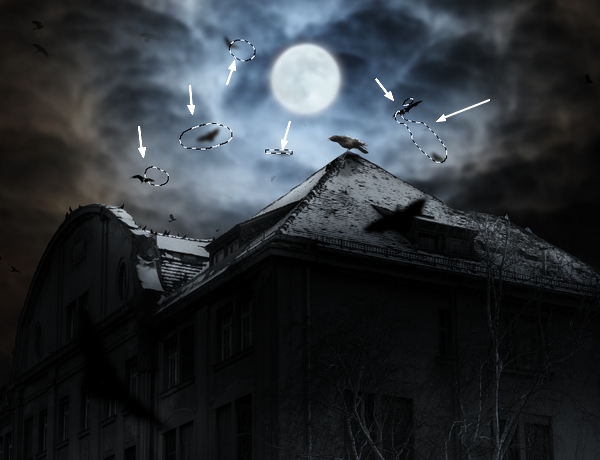
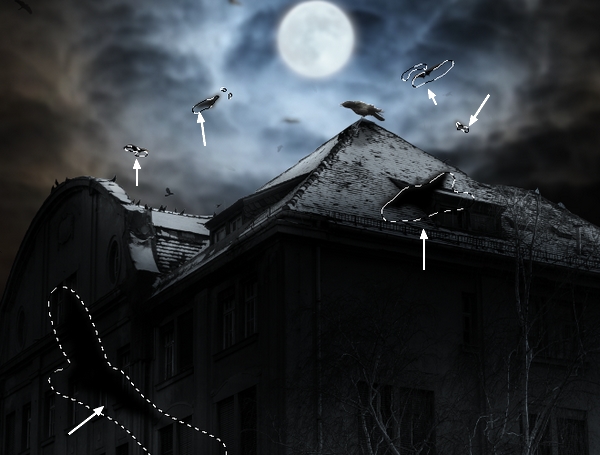
Open the bats image. Isolate them from the background using the Magic Wand Tool (W) . Select different bats and add them to the sky and the roof, transform them if needed. Apply a Gaussian Blur of 4px to some of them to create depth for the scene:
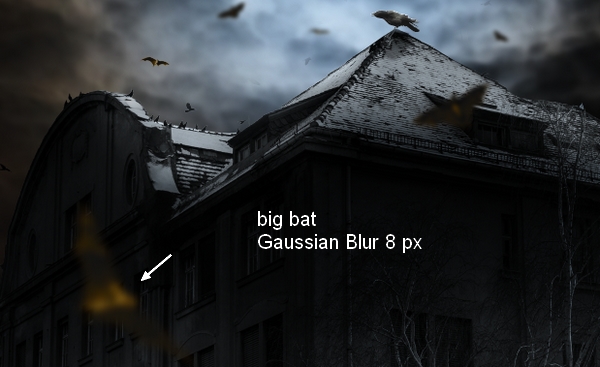
Step 19
Add a bat to the lower left of the scene, increase its size and apply a Gaussian Blur of 8px to it:
Step 20
Select all the bat layers and press Cmd/Ctrl+G to make a group for them. Change the mode of this group from Pass Through (default group mode) to Normal 100% . Use a Hue/Saturation adjustment layer to desaturate the bats:
Step 21
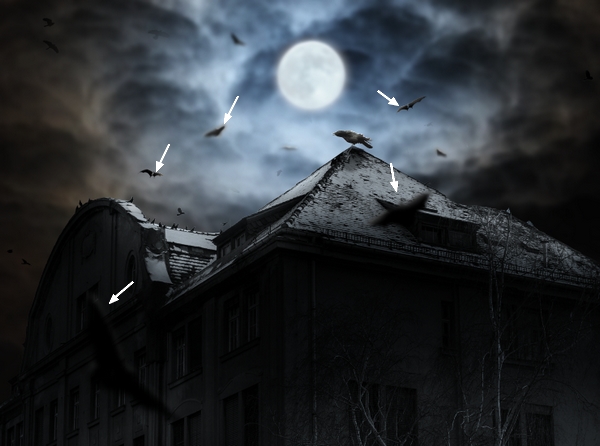
Use a Curves adjustment layer to increase the contrast of the bats, especially the lower ones. On this layer mask, use a soft black brush to erase the bats in the sky to keep their lightness:
Step 22
Make another Curves adjustment layer to increase the light on the bats. On this layer mask, use a soft black brush to erase the lower part of the bats and leave the light visible on the upper side.
Step 23
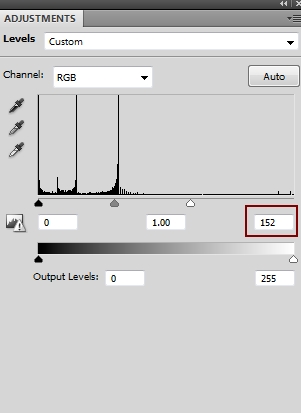
Use a Levels adjustment layer to enhance the highlights on the bats:
Step 24
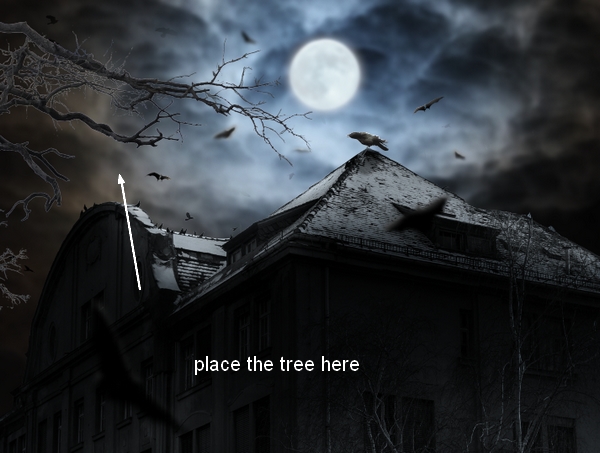
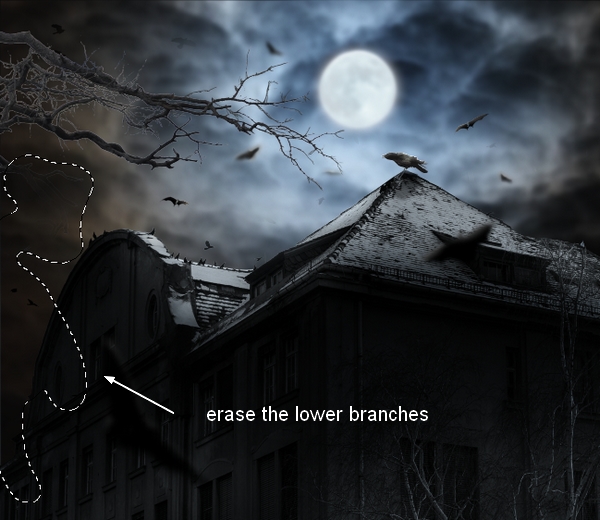
Cut out the tree and place it at the upper left of the scene, above the house:
Add a mask to this layer and erase the lower branches:
Step 25
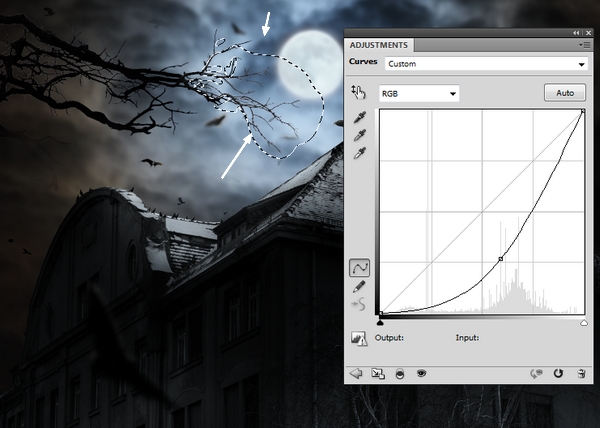
Use a Curves adjustment layer (set as Clipping Mask) to darken the tree. On this layer mask, use a soft brush to erase the part near the crow and moon to keep the lightness there:
Step 26
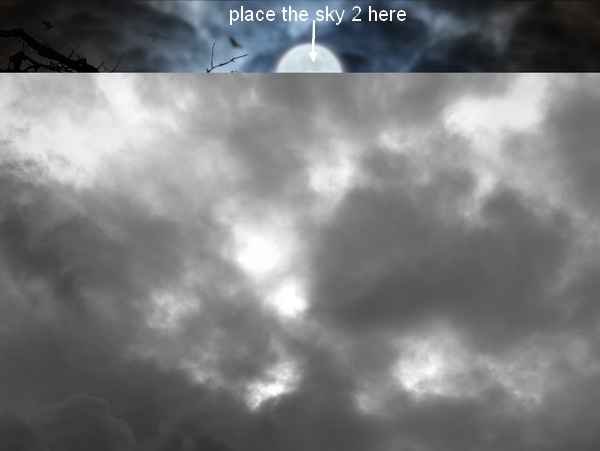
Drag the sky 2 image into our working document:
Add a mask to this layer and use a soft black brush to remove the hard edges and reduce the sky intensity to create some mist to the scene:
Step 27
Use a Curves adjustment layer to darken the mist. On this layer mask, use a soft black brush to erase the following parts to make the effect there more visible:

Step 28
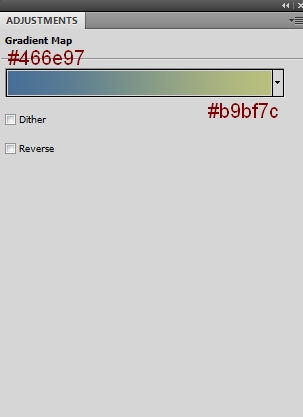
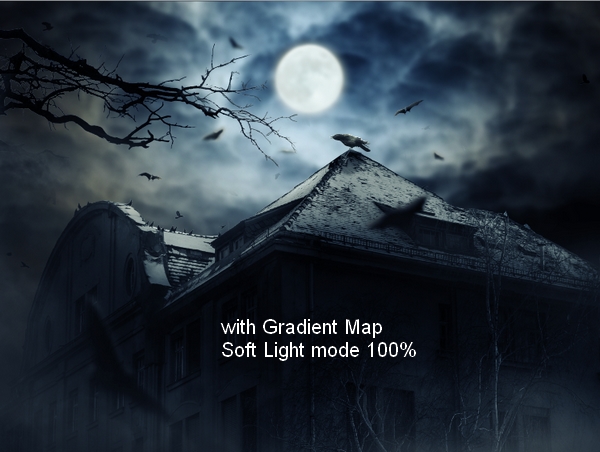
It’s time for coloring the scene. Create a Gradient Map adjustment layer on the top of the layers and change the mode to Soft Light 100% :
Step 29
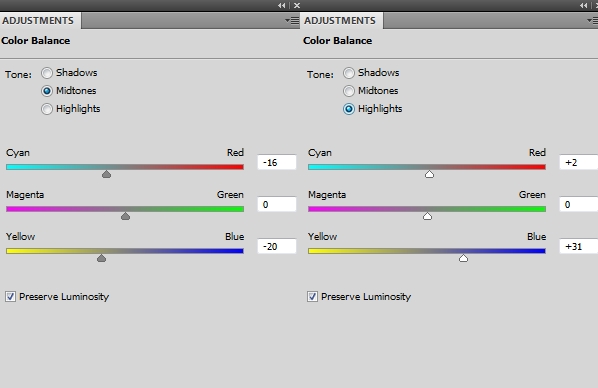
Use a Color Balance adjustment layer to change the whole scene color:

Step 30
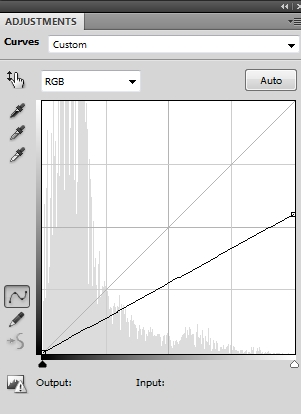
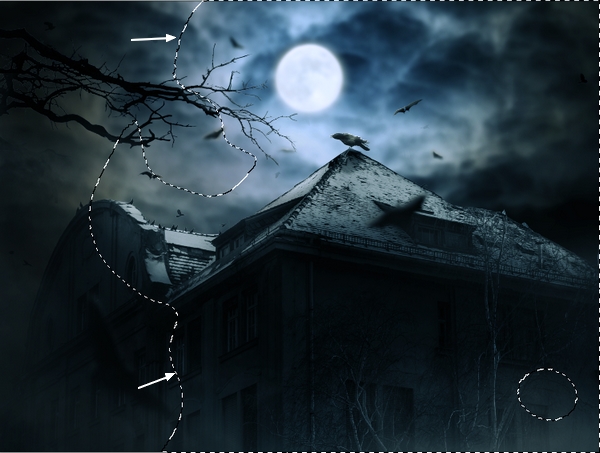
Make a Curves adjustment layer and decrease the lightness. On this layer mask, use a soft black brush to erase around the picture except the left side and a small area at the lower right of the house:
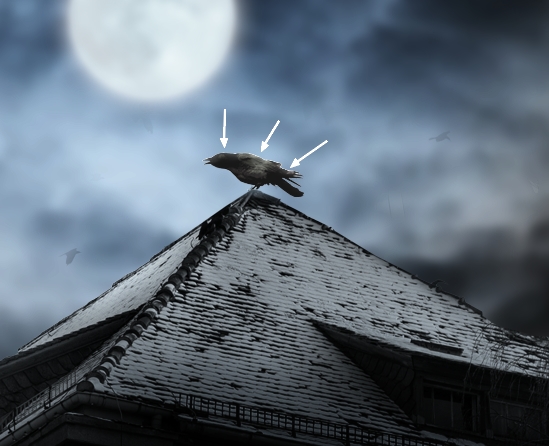
And We’re Done!
I hope that you enjoyed the tutorial.